
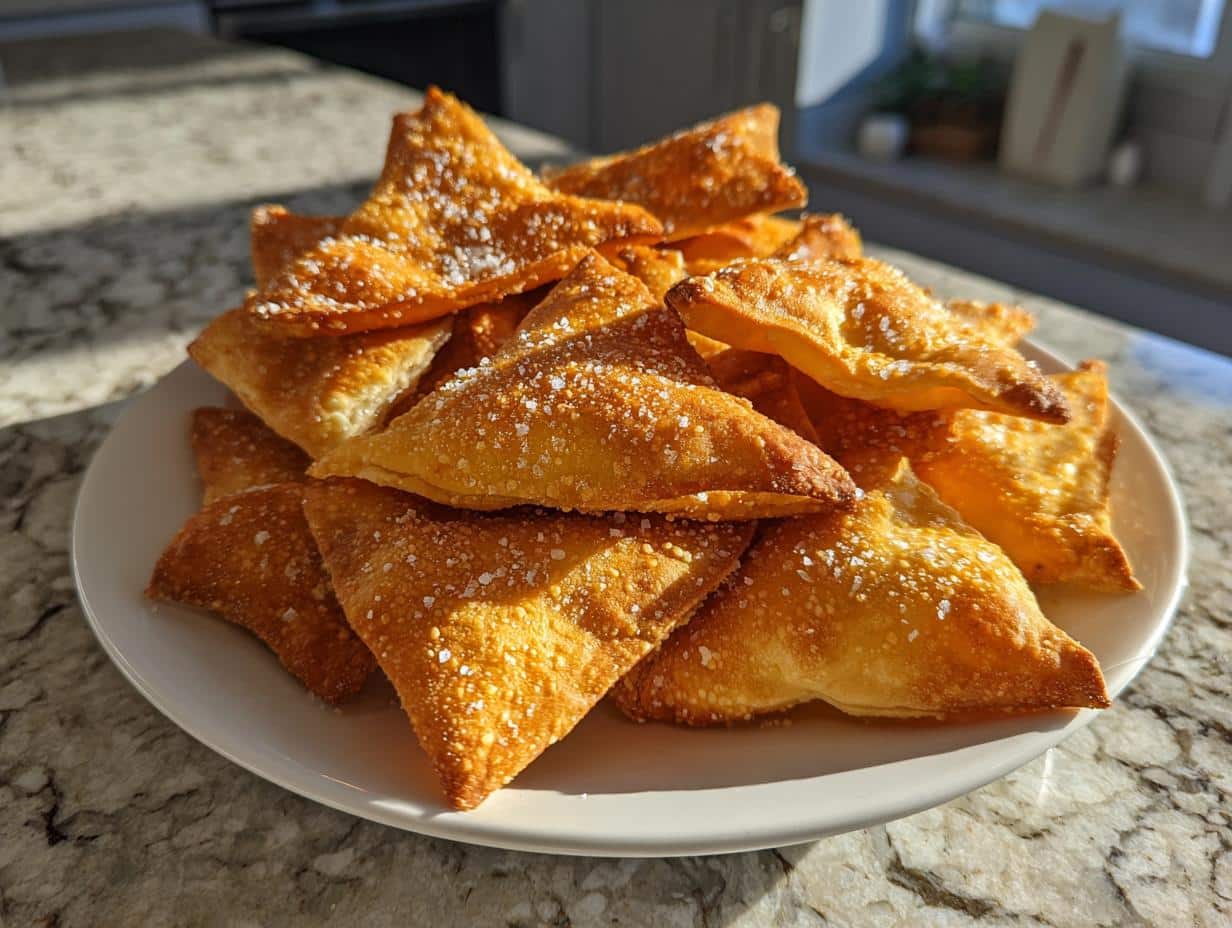
There’s something truly magical about crispy pita bread—it’s the kind of snack that makes you go “wow” with every single bite. And guess what? Your air fryer can make it happen in mere minutes! I first discovered this brilliant trick one lazy Sunday when I was desperately craving something crunchy to dip into hummus. Now, it’s my absolute go-to for quick appetizers, game-day snacks, or even a simple side dish. Air-fryer pita is ridiculously easy, consistently crispy, and totally customizable to your taste. Trust me, once you try it, you’ll wonder how you ever lived without this quick and delicious method.
Why You’ll Love This Air‑Fryer Pita
Once you experience air-fryer pita, you’ll be completely hooked—and here’s precisely why:
- Quick & Easy: From initial prep to perfectly crispy finish, it takes just 10 minutes. This is ideal for when you’re hungry *now* and don’t want to wait.
- Perfectly Crispy: The air fryer delivers that coveted golden crunch without making the pita greasy. It’s an addictively good texture.
- Totally Customizable: Feel free to add your favorite spices or herbs to truly make it your own. I personally adore a hint of garlic powder, but you can get creative with paprika, za’atar, or even a sweet cinnamon sugar blend.
- Healthier Than Deep-Fried: You achieve all the satisfying crunch with just a fraction of the oil typically used in deep-frying. It’s a win-win for your taste buds and your waistline!
- Minimal Cleanup: Simply toss the cut pita pieces in the air fryer basket, and you’re done. No messy oil splatters or complicated clean-up required.
Seriously, this air-fryer pita is an absolute game-changer for quick snacks, versatile sides, or any dipping occasion. You’ll find yourself making it on repeat!
Ingredients for Air‑Fryer Pita
Here’s the true beauty of this recipe—you only need a handful of incredibly simple ingredients to make culinary magic happen. But trust me, each one plays a starring role in creating that perfect crispy texture and fantastic flavor. Here’s what you’ll need:
- 2 medium pita bread rounds (cut into 8 triangles each) – Both fresh or day-old pita work well, but I often prefer slightly thicker varieties for an even better crunch!
- 1 tbsp extra virgin olive oil – This is just enough to lightly coat the pita without making it greasy. If you’re like me and love that extra golden sheen, feel free to add an extra small drizzle.
- 1/2 tsp kosher salt – The coarse grains tend to stick better and provide that satisfying, well-distributed salty bite. Table salt works in a pinch too, but use just a tiny bit less.
- 1/2 tsp garlic powder (optional) – This is my personal must-have for an extra flavor punch. Sometimes I’ll swap in smoked paprika or za’atar when I’m feeling a bit more adventurous.
See? Nothing complicated here at all. Just common pantry staples that effortlessly transform into something extraordinary in a matter of minutes. Now, let’s get cooking!
How to Make Air‑Fryer Pita
Okay, here’s precisely where the magic unfolds—turning soft, pliable pita bread into beautifully crispy, golden triangles! Don’t let the sheer simplicity of this process fool you. There’s a tiny bit of technique involved (nothing crazy, I promise) to ensure they come out perfectly crunchy every single time.
Step 1: Preheat and Prep
First things first—preheat your air fryer to a steady 375°F (190°C). I know, I know, skipping the preheat can be incredibly tempting when hunger strikes (*raises hand guiltily*), but trust me, those extra 2 minutes make a remarkable difference for achieving truly even cooking and consistent crispiness.
While your air fryer is heating up, grab your pitas and expertly slice them into 8 triangles each—just as you would easily cut a pizza! I often reach for kitchen scissors because I find them quicker and more efficient than a knife, but either tool works perfectly well. Pro tip: If your pita bread pockets are particularly puffy, gently separate the layers first—the thinner halves crisp up absolutely beautifully.
Step 2: Season and Cook
Now, toss those freshly cut pita triangles into a bowl with the olive oil, salt, and garlic powder (or any other delightful spices you’ve chosen to use). Don’t be shy—get your hands in there and gently massage everything so that each piece gets a nice, even coating without becoming soggy. The goal is a light, even layer of flavor.
Here’s the golden rule, which I learned the hard way: ALWAYS cook in a SINGLE LAYER ONLY in your air fryer basket. I made the mistake of dumping in a big pile once, and I ended up with a sad mix of half-crispy, half-soggy pita. Not ideal! Cook for an initial 3 minutes, then give them a good shake or flip them over for even browning and consistent crispiness.
Keep a very close eye on them during the final minute—they transition from perfectly golden to “oops, a bit too dark” incredibly fast! When the edges are wonderfully crisp and lightly browned (which typically takes about 4-5 minutes total), they’re absolutely done. Let them cool ever so slightly—they will continue to crisp up even more as they rest.
Tips for Perfect Air‑Fryer Pita
After making enough batches of air-fryer pita to feed a small army (okay, maybe just my incredibly snack-loving family!), I’ve picked up some foolproof tricks for achieving absolute perfection every single time. These small details truly make all the difference between “good” and “can’t-stop-eating-them” crispy results:
- Peek often! Air fryers can vary wildly in their power and efficiency—my particular model runs quite hot, so I always start checking at the 2-minute mark. The delicate line between perfectly golden and slightly burnt is much thinner than you might think.
- Give them space. Overcrowding the basket inevitably leads to steamed pita bread rather than crispy. If your air fryer basket is on the smaller side, it’s definitely worth cooking in batches. I promise, those extra 3 minutes are entirely worth it for superior crispness.
- Thicker pita? Add time. Those heartier, wholesome whole-wheat pita varieties will likely need an extra minute or two to reach optimal crispness. Listen carefully for the light “tap tap” sound when you gently shake them—that’s your reliable cue that they’re properly crisp.
- Fresh herbs go last. I learned this the hard way—delicate fresh rosemary, for example, can turn into bitter little twigs if cooked for too long in the air fryer. Instead, sprinkle them generously on your pita right after it finishes cooking for maximum flavor and freshness.
- Salt after cooking? Sometimes, I’ll apply half of the salt before cooking and then sprinkle a little more on after they come out. This technique gives them that gourmet, desirable “salt-kissed” effect that really elevates the flavor.
Oh! One more crucial thing—if your pitas happen to come out softer than you’d ideally like, simply pop them back into the air fryer for another minute or so. The air fryer is quite forgiving of most minor mistakes (unlike my oven, which seems to hold grudges!).
Variations for Air‑Fryer Pita
One of my absolute favorite aspects about air-fryer pita? You can dress it up in a hundred different, delicious ways to perfectly match whatever mood you’re in! I’ve spent way too many happy afternoons experimenting with various flavors—here are my absolute favorite twists to keep things exciting and your snack game strong:
Savory Twists
When I’m craving something with a delightful little kick, these variations never, ever disappoint:
- Za’atar Magic: After cooking, lightly brush the warm pita with a bit of olive oil and generously sprinkle it with za’atar (that incredible Middle Eastern spice blend featuring thyme, sesame, and sumac). The aromatic smell alone will instantly transport you!
- Parmesan Crisps: Add freshly grated Parmesan cheese before air frying—it melts into wonderfully lacy, crispy edges that are downright addictive and incredibly savory.
- Spicy Chili Flakes: Toss your pita pieces with olive oil, a dash of garlic powder, and a generous pinch of crushed red pepper flakes. This is absolutely perfect with a cold beer on game day!
- Everything Bagel Style: That universally beloved seasoning mix isn’t just for bagels anymore—try it on your air-fried pita for the ultimate, flavor-packed snack experience.
Sweet Surprises
Yes, you read that right—air-fryer pita also makes an absolutely amazing dessert! My kids constantly beg for these sweet variations:
- Cinnamon Sugar: Toss warm pita bread with a bit of melted butter, then generously dunk it in a mixture of cinnamon and sugar. It tastes remarkably like churros, but it’s infinitely easier to make!
- Honey & Sesame: Drizzle the crispy pita with a luscious layer of honey and sprinkle with lightly toasted sesame seeds—so incredibly good served with a comforting cup of tea.
- Chocolate-Dipped: Melt some of your favorite chocolate, dip half of each pita triangle into it, and let it set. This simple trick makes them elegant enough to serve to guests!
The best part of these variations? You have complete freedom to mix and match these ideas however you like! Just last week, I made a party platter with half spicy za’atar pita and half cinnamon sugar pita—both disappeared embarrassingly fast. What delicious combination will you try first?
Serving Suggestions
Oh, the serving possibilities for air-fryer pita are truly endless and exciting! I absolutely adore serving them still warm, fresh from the air fryer basket—they are simply perfect for scooping up creamy hummus or cool, refreshing tzatziki. For a more elaborate and satisfying Mediterranean spread, consider adding some rich baba ganoush and a crisp, vibrant cucumber salad to the mix. When the weather outside turns chilly, these crispy pitas are fantastic for dunking into a hearty bowl of tomato soup, offering a wonderful alternative to traditional grilled cheese. Honestly, they tend to disappear from the serving plate before I can even finish setting the table!
Storage and Reheating
Let’s be real—this air-fryer pita is so incredibly good, it rarely lasts long enough to even consider storing it. But if you somehow manage to have any glorious leftovers (good for you!), here’s how to keep them wonderfully crispy and fresh. First, allow the pita to cool completely—no one enjoys a soggy container. Then, stash them securely in an airtight container at room temperature. They will typically stay delightfully crunchy for up to 3 days, though I seriously doubt they’ll last that long in your pantry.
Now, reheating is where the air fryer truly shines once again. Just pop them back into the air fryer for a quick 1–2 minutes at 375°F (190°C), and they will emerge as perfectly crispy as they were on day one. I’ve attempted reheating them in the oven and, dare I say, the microwave (*shudder*), but absolutely nothing compares to the air fryer for restoring that ideal, satisfying crunch. Pro tip: If they’ve lost a bit of their original seasoning, simply sprinkle on a little extra salt or your preferred spice after reheating. Trust me, no one will ever know they’re leftovers!
Air‑Fryer Pita Nutrition
Let’s talk numbers—because who doesn’t appreciate a snack that’s both incredibly delicious *and* doesn’t completely derail your calorie count? Here’s a general breakdown for one serving (approximately 1/2 a pita bread round):
- Calories: 80 kcal
- Fat: 3g (0.5g saturated, 2.5g unsaturated)
- Carbohydrates: 12g
- Protein: 2g
- Sugar: 0g
- Sodium: 200mg
Now, a quick but important disclaimer: These nutritional values are estimates only and can certainly vary depending on the specific ingredients and brands you choose to use. For instance, if you’re a bit heavy-handed with the olive oil (no judgment here—I’ve absolutely been there!), the fat content might increase slightly. But overall, this air-fryer pita stands as a significantly lighter and healthier alternative to many deep-fried snacks, and it’s packed with more than enough crunch to satisfy any craving. So go ahead—indulge guilt-free!
FAQ About Air‑Fryer Pita
After making countless batches of this incredibly popular recipe (and fielding numerous texts from friends who eagerly tried it!), I’ve had the pleasure of answering just about every air-fryer pita question imaginable. Here are the ones that pop up most often—complete with my thoroughly tested, snack-approved answers!
Can I use whole-wheat pita?
Absolutely, you can! Whole-wheat pita works wonderfully—just be prepared to add an extra minute or two to the cooking time, as it tends to be a bit denser than white pita. I particularly love the subtle, nutty flavor it imparts. The only minor catch? Keep a close eye on it, because its darker color can make it a little harder to visually discern when it’s perfectly golden. Listen for that satisfying “tap tap” sound when you gently shake the basket—that’s your clearest indication that they’re perfectly done.
Why is my pita not crispy?
Oh, I completely understand that frustration—there’s nothing quite as disappointing as a limp air-fryer pita! Usually, this issue boils down to one of three common culprits: an overcrowded basket (remember to give each piece ample space to crisp up!), not quite enough oil (even just an extra ½ tsp can make a significant difference), or skipping the essential preheat step. Also, and this is crucial—do NOT stack them immediately after cooking! Allow them to cool in a single layer on a wire rack so any escaping steam can dissipate instead of making them soggy.
Can I make these ahead for parties?
You absolutely bet you can! I frequently make large batches of air-fryer pita when I’m hosting. Simply cook them as you normally would, let them cool completely, and then store them in an airtight container (you can place parchment paper between layers to prevent sticking). Before your guests arrive, just reheat them in the air fryer at 375°F (190°C) for a quick 90 seconds—they’ll taste as though they were freshly made. Pro tip: Prepare extra seasoning blend to sprinkle on after reheating for an extra burst of maximum flavor.
What’s the best dip for air-fryer pita?
Where do I even begin? My current obsession is a delightful whipped feta with a drizzle of honey, but timeless classics like creamy hummus or refreshing tzatziki never, ever disappoint. For something a little different and exciting, try blending roasted red peppers with Greek yogurt, or mixing tahini with a touch of maple syrup. Honestly, these pitas are so incredibly good that I sometimes eat them completely plain—but please, don’t tell my dip-loving friends I said that!
Can I use this method for other flatbreads?
Absolutely! Other flatbreads like naan, lavash, and even standard flour tortillas work beautifully using this air fryer method. You’ll simply need to adjust the cooking time based on their thickness—for example, thin lavash might only require a mere 2 minutes. My kids absolutely love when I make “air-fryer tortilla chips” this way, seasoned with lime and chili powder. Just remember: the crispier the original bread or flatbread, the quicker it will cook, so always check frequently!
10-Minute Air-Fryer Pita That’s Dangerously Crispy

- Author: Judy Wilson
- Prep Time: 5 mins
- Cook Time: 5 mins
- Total Time: 10 mins
- Yield: 2 servings
- Category: Appetizer
- Method: Air Fryer
- Cuisine: Mediterranean
- Diet: Vegetarian
Make crispy pita bread quickly with an air fryer. Perfect for dipping or as a side dish.
Ingredients
- 2 pita bread rounds
- 1 tbsp olive oil
- 1/2 tsp salt
- 1/2 tsp garlic powder (optional)
Instructions
- Preheat air fryer to 375°F (190°C).
- Cut pita bread into triangles or strips.
- Toss pita pieces with olive oil, salt, and garlic powder.
- Place in air fryer basket in a single layer.
- Cook for 3-5 minutes until golden and crispy.
- Flip halfway through for even cooking.
Notes
- Check frequently to avoid burning.
- Store leftovers in an airtight container for up to 3 days.
- Add herbs like oregano or paprika for extra flavor.
Nutrition (Estimated per 1/2 pita serving)
- Serving Size: 1/2 pita
- Calories: 80
- Sugar: 0g
- Sodium: 200mg
- Fat: 3g
- Saturated Fat: 0.5g
- Unsaturated Fat: 2.5g
- Trans Fat: 0g
- Carbohydrates: 12g
- Fiber: 1g
- Protein: 2g
- Cholesterol: 0mg
Keywords: air fryer pita, crispy pita, quick snack