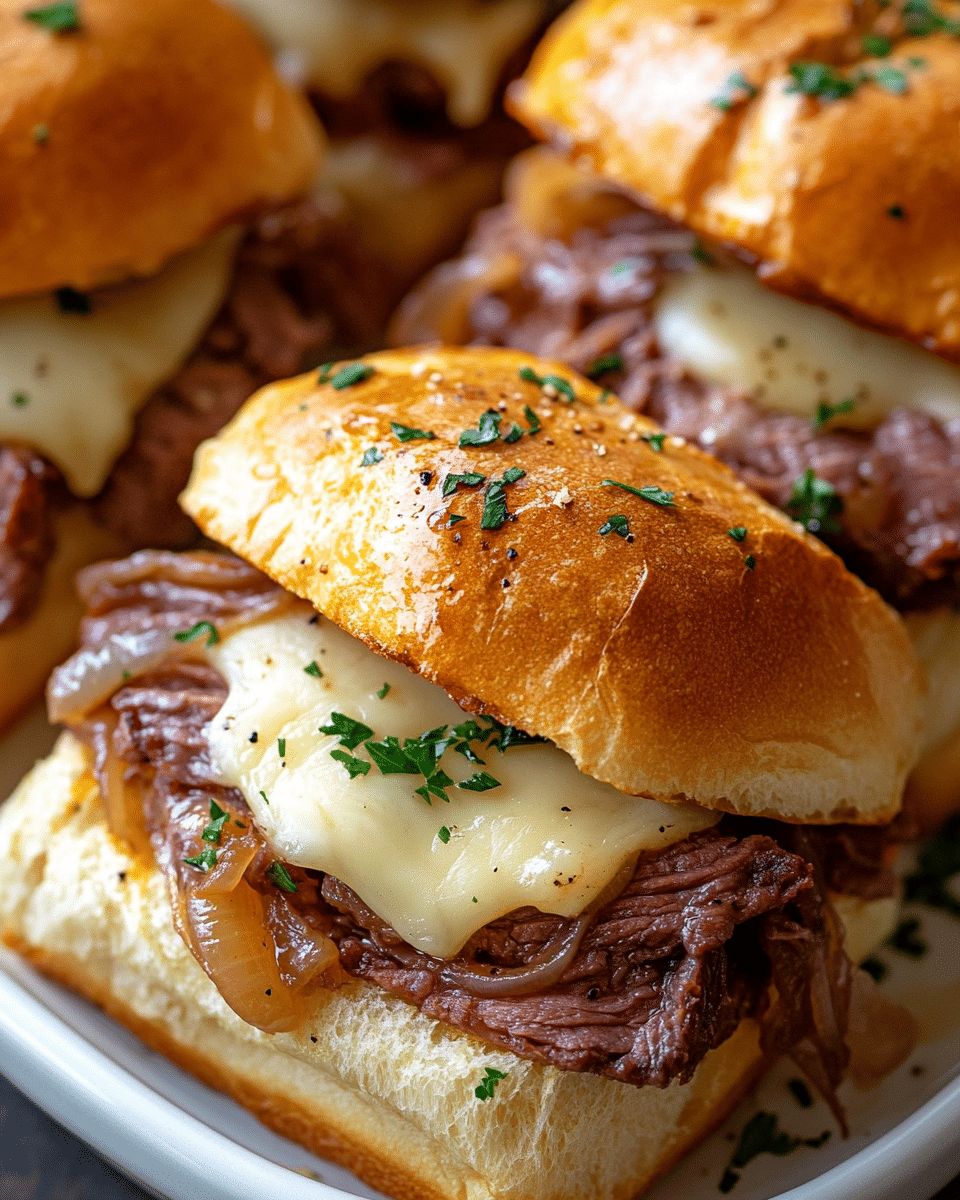
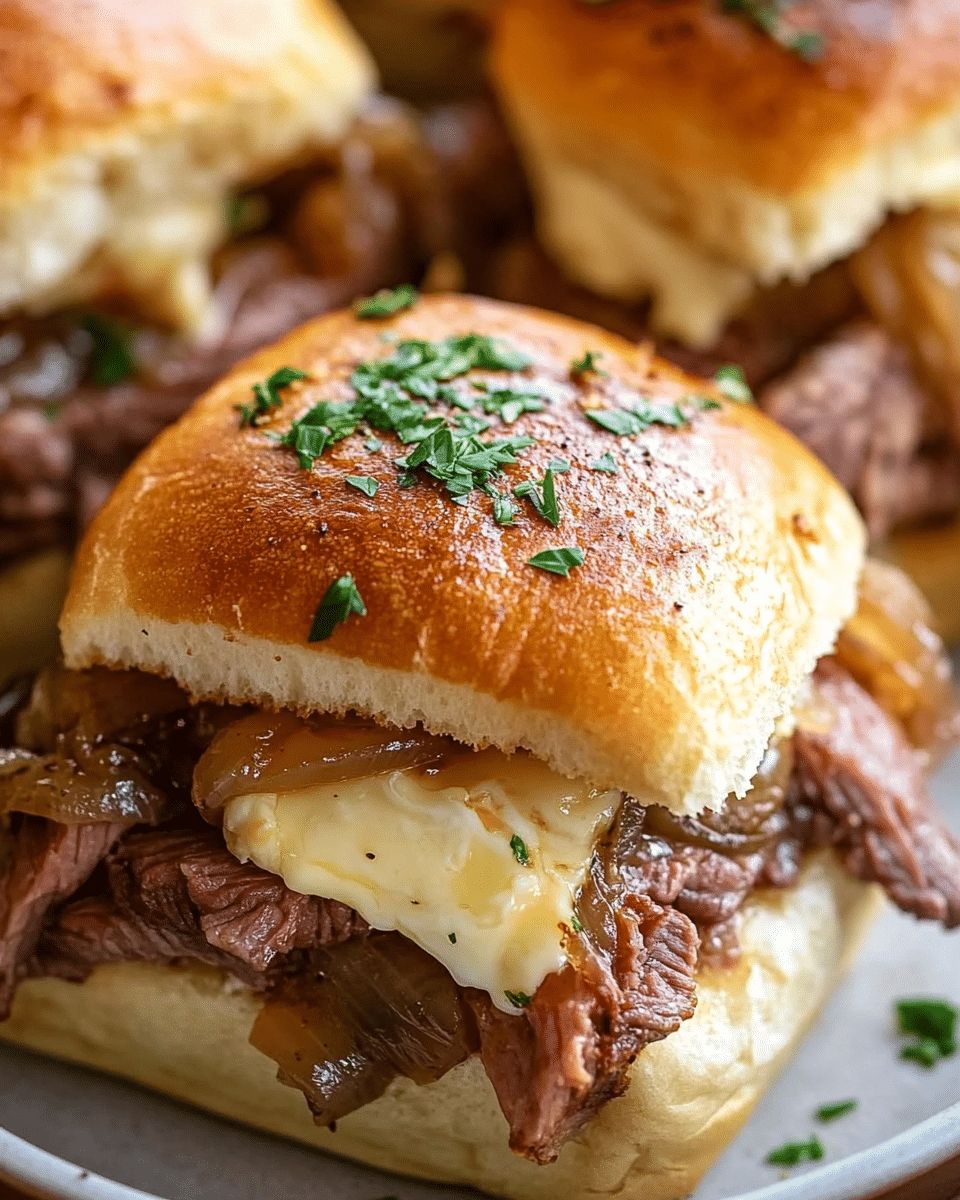
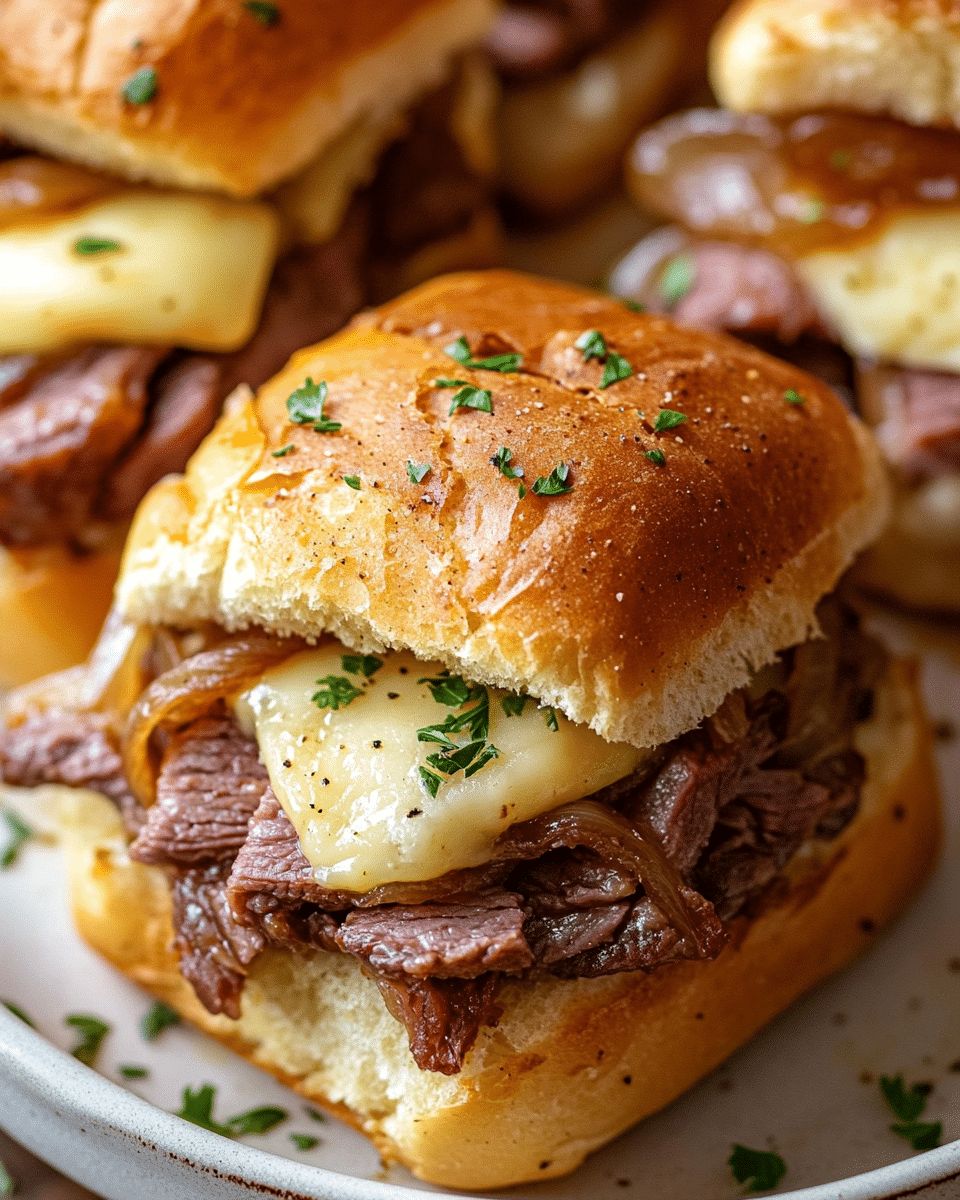
You’re about to discover a sandwich that delivers every time—warm, cheesy, and incredibly hearty Roast Beef Sliders with Jus. Whether you’re planning a casual game-night spread, hosting a weekend family gathering, or simply craving something soul-satisfying for dinner, this recipe has everything you need. Picture juicy roast beef, creamy horseradish-mayo, sweet caramelized onions, and beautifully melted cheese, all nestled in soft, buttery rolls.
The best part? You’ll spend under an hour in the kitchen, but the gourmet, savory flavors will have everyone asking for seconds. Lightly toasted to prevent sogginess and brushed with a garlic-herb butter, these crowd-pleasing sandwiches are served alongside a rich, silky homemade jus for the ultimate dipping experience. One bite, and you’re hooked!
Quick Answer: These Roast Beef Sliders are a fast, 45-minute appetizer featuring layered deli roast beef, melted cheese, and caramelized onions on toasted butter rolls. Brushed with an herb-butter glaze and baked until golden, they are served hot alongside a quick, savory homemade beef jus for dipping.
Why You’ll Love These Roast Beef Sliders with Jus 🧀
You’re stacking layers of pure flavor and texture, and pairing it with a rich dip that turns an ordinary sandwich into an extraordinary culinary experience. If you are looking for a reliable, guaranteed hit for your next gathering, here is exactly why this recipe works for everyone:
- Flavor Bombs at Every Bite: The combination of creamy, tangy mayo-horseradish, savory roast beef, melted cheese, and sweet caramelized onions means that every single angle you turn hits another delicious note on your palate.
- Quick Yet Premium: Yes, you will be using deli-thin roast beef and pre-made slider rolls, but the specific layering technique and the oven-baking process get you that coveted restaurant-style finish without any of the fuss.
- Textural Heaven: Lightly toasted rolls prevent sogginess and crisp up beautifully when brushed with a savory buttery herb glaze. Dunking them into the hot jus adds a luxurious silkiness that contrasts perfectly with the crisp bun.
- Built for Big Crowds (or Just You): Throw a whole pan in the oven, portion out the jus into small serving bowls, and you’re done. It is incredibly scalable, making it great for casual entertaining, potlucks, or simply satisfying a solo comfort-food craving.
- Ultra-Customizable: Swap out the cheeses, add a spicy aioli, or choose different buns or roast meats. You can make this foundational recipe your own in endless ways.
Preferences always vary, but once you sink your teeth into a warm, cheese-pull slider dunked in a savory jus, you’ll know this recipe has earned a permanent spot on your kitchen menu.

Ingredients for Roast Beef Sliders with Homemade Jus
Before forging ahead with the assembly, it is crucial to gather and measure all your ingredients. Proper preparation ensures smooth sailing and prevents any last-minute pantry panic while your oven is preheating.
For the Sliders
This savory sandwich relies on a few high-impact ingredients. Always opt for high-quality deli meat and fresh bread for the best results.
| Ingredient | Amount |
|---|---|
| Soft butter rolls (like Hawaiian sweet rolls) | 12 rolls |
| Mayonnaise | ¼ cup |
| Cream-style horseradish | 1 tbsp |
| Thinly sliced provolone or Swiss cheese | ½ lb |
| Thinly sliced deli roast beef | ½ lb |
| Caramelized onions | ½ cup |
| Unsalted butter, melted | 4 tbsp |
| Worcestershire sauce | 1 tsp |
| Onion powder | ½ tsp |
| Garlic powder | ¼ tsp |
| Fresh parsley, chopped | ½ tbsp |
For the Homemade Jus
Do not skip the homemade jus! It elevates the dish entirely, transforming a simple baked slider into a French Dip-inspired masterpiece.
| Ingredient | Amount |
|---|---|
| Beef broth or stock | 2 cups |
| Unsalted butter | 2 tbsp |
| Large garlic clove, minced | 1 clove |
| All-purpose flour | 1½ tbsp |
| Worcestershire sauce | 1 tbsp |
| Beef bouillon base | 1–2 tsp |
| Fresh thyme | 1 tsp |
| Salt & freshly ground black pepper | To taste |
Step‑by‑Step: How to Make Roast Beef Sliders
Creating these ultimate party sliders is an exercise in layering flavors. Follow these distinct steps to ensure perfectly melted cheese, warm beef, and a crisp bun that stands up to dipping.
Step 1: Prep and Toast the Rolls
- Using a large serrated knife, carefully slice the entire slab of butter rolls in the middle horizontally, keeping the individual rolls connected.
- Place both the top and bottom halves, cut side up, on a sturdy sheet pan.
- Place under the broiler for just 1–2 minutes until lightly golden. Do not walk away! Your goal is a gentle golden toast, not burnt bread. Toasting creates a barrier that keeps them crisp later.
Step 2: Layer the Savory Filling
- Preheat your oven to 350°F (175°C). Lightly grease a 9×13 ceramic or glass baking dish.
- In a small bowl, whisk together the mayonnaise and cream-style horseradish until perfectly smooth.
- Lay the toasted bottom roll halves inside your prepared baking dish, cut-side up.
- Spread exactly half of your mayo-horseradish mixture evenly across the bottom buns.
- Now, build your layers in this specific order:
- First layer: Place half of the provolone or Swiss cheese down to protect the bottom bun.
- Second layer: Fold and drape the thin-sliced roast beef evenly across the cheese.
- Third layer: Scatter the rich, sweet caramelized onions over the beef.
- Fourth layer: Top with the remaining cheese.
- Spread the rest of the mayo mix onto the cut-side of the top rolls, then carefully place the “lid” over the layered filling.
Step 3: Brush, Cover, and Bake
- In a separate mixing bowl, combine the melted butter, Worcestershire sauce, garlic powder, onion powder, and freshly chopped parsley. Whisk until incorporated.
- Using a pastry brush, generously coat the tops and sides of the assembled sliders with this savory butter mixture.
- Cover the baking dish tightly with aluminum foil and bake for exactly 20 minutes to heat the core and melt the cheese.
- Remove the foil and bake for an additional 5–8 minutes. Watch for the tops to turn a gorgeous golden-brown and the edges to crispen slightly.
- Remove from the oven and let rest for 2 to 3 minutes. Letting the cheese reset slightly ensures clean cuts. Slice into individual sliders.
Step 4: Craft the Perfect Jus (Dipping Sauce)
- While the sliders are baking, melt the butter in a small saucepan over medium heat.
- Add the minced garlic and sauté for approximately 1-2 minutes until beautifully fragrant, ensuring it does not brown.
- Stir in the all-purpose flour and cook for another 1–2 minutes, whisking constantly to form a light blonde roux.
- Slowly whisk in the beef broth, Worcestershire sauce, fresh thyme, and a pinch of black pepper, ensuring no lumps remain.
- Bring the mixture to a gentle boil, then immediately reduce the heat and let it simmer for 10 minutes to develop the flavor.
- Taste the jus, then whisk in the beef bouillon base, salt, and extra pepper to suit your palate.
- For a luxurious, silky texture, strain the finished jus through a fine-mesh sieve to remove the garlic bits and thyme sprigs.
Pro-Tip for the Perfect Dip: Keep the jus warming on the stove on the lowest setting while you slice the sliders. Pour it into individual ramekins right before serving so it stays piping hot for every guest!
Expert Tips for Next‑Level Sliders
Want to guarantee these are the best sliders your friends and family have ever tasted? Keep these crucial chef tips in mind:
- Use Fresh Deli Roast Beef: Always ask your local deli counter for a thin, freshly-sliced roast-beef cut. The flavor, moisture, and tenderness are undeniably superior to pre-packaged tub meats.
- Don’t Skimp on the Jus: The jus is what transforms these sliders from basic to restaurant-quality. The contrast between the crispy, buttery bun and the rich, savory broth is essential.
- Toast the Rolls First: A gentle broil strengthens the internal structure of the bread. This step adds a necessary crisp texture that stands up to saucy, heavy fillings without turning to mush.
- The Herb-n-Butter Brushing: This simple glaze saves time but delivers massive, complex flavor to the otherwise plain buns. Don’t skip the Worcestershire in the butter—it adds an incredible umami kick.
- Let Them Rest Before Serving: It is tempting to dive right in, but even a couple of minutes of cool-down time helps the melted cheese maintain its shape, making slicing significantly cleaner and less messy.
Variations & Customization Ideas
You can easily tailor these sliders to suit your personal tastes, what you have in the fridge, or specific dietary needs. Here are a few creative ideas to make this recipe your own:
Meat Swaps
If roast beef isn’t your favorite, these sandwiches are highly adaptable. Swap the roast beef with high-quality turkey breast slices or savory honey-baked ham. Alternatively, use leftover shredded pot roast or smoked brisket in place of the deli-style meat for a heartier, rustic feel.
Cheese Choices
While Swiss and provolone offer an excellent, mild melt, you can boldly change the flavor profile with different dairy. Try sliced sharp cheddar or smoked gouda for a deeper, more robust flavor. You can also mix cheeses: try half mozzarella and half mild cheddar for an epic, gooey cheese pull.
Get Spicy
If your crowd loves heat, it is incredibly easy to turn up the temperature. Layer freshly sliced jalapeños or pickled banana peppers over the meat. You can also spice up the mayo-horseradish spread with a generous dash of Sriracha, chipotle powder, or your favorite hot sauce.
Dietary Modifications (Gluten-Free & Vegetarian)
To make this a Gluten-Free option, simply use your favorite gluten-free dinner rolls. For the jus, swap out the all-purpose flour for a cornstarch slurry (1 tablespoon of cornstarch mixed with 1 tablespoon of cold water, whisked into the simmering broth). For a Vegetarian Version, completely replace the roast beef with thickly sliced, roasted portobello mushrooms or your favorite grilled plant-based deli slices, and use a rich vegetable or mushroom broth for the jus.
Side Dishes That Pair Beautifully
Turn these rich, savory sliders into a well-rounded, full-spread meal by pairing them with fresh or crispy appetizing sides. Here is what works best:
- Crispy Potato Wedges – Oven-baked with rosemary and sea salt.
- Creamy Coleslaw – Adds much-needed crunch and a bright, acidic contrast.
- Roasted Brussels Sprouts – Brings a deep, savory, earthy balance to the plate.
- Sweet Potato Fries – Offers a caramelized sweetness that pairs wonderfully with the salty beef.
- Simple Green Salad – A light, refreshing contrast tossed in a sharp vinaigrette.
How to Store & Reheat Leftovers
If you find yourself with leftovers (which is rare!), storing and reheating them properly ensures they are just as good the next day.
Refrigeration and Reheating
Store fully cooled, sliced slider portions in an airtight container in the refrigerator for up to 3 days. When you are ready to eat, cover them loosely with foil and warm them in a 300°F oven for 10–12 minutes until the cheese is gooey again. Avoid the microwave! Microwaving will steam the bread, turning your perfectly crisp rolls into a rubbery mess. The oven is always best.
Freezing Option
These make a fantastic meal-prep option. Assemble the unbaked sliders in a disposable foil pan, wrap tightly in heavy-duty aluminum foil, and then wrap again in plastic wrap. Freeze for up to 1 month. You can bake them straight from frozen at 350°F for 30–35 minutes before removing the cover to brown the tops.
Frequently Asked Questions (FAQ)
1. Can I prep these sliders ahead of time?
Absolutely. You can assemble the sliders completely—minus the final butter brush on top. Wrap the baking dish tightly in plastic wrap and refrigerate overnight. The next day, apply the garlic-herb butter brush just before baking. This gives you fresh-out-of-the-oven vibes with zero party-day stress.
2. What type of cheese works best?
You’re aiming for a combination of excellent melting properties and a mild, complementary flavor. Provolone and Swiss are the classic choices for beef. However, a sharp cheddar brings a delightful tang, while pepper jack introduces a lovely subtle heat. Feel free to mix and match!
3. Can I freeze these before baking?
Yes! As mentioned in the storage section, you can freeze the unbaked sliders for up to a month. Bake them straight from frozen (no thawing required) to ensure the bread doesn’t get soggy. Just add about 10-15 extra minutes to your covered baking time.
4. What is a good substitute for horseradish?
If you or your guests can’t handle the sharp bite of horseradish, a hearty Dijon mustard or whole-grain mustard works beautifully in the mayo mixture. You can also omit it entirely, but the slight tang of mustard or horseradish really enhances the savory beef flavor.
5. How do I make the jus thicker, like a gravy?
A traditional jus is meant to be thin and broth-like. However, if you prefer a thicker dipping sauce, simply let it simmer longer until it’s reduced further. Alternatively, you can whisk an extra ½ tablespoon of flour into the butter roux at the very beginning, before adding your beef broth.

Conclusion: Bring These Sliders to Your Table Tonight
You’ve just walked through a beautifully layered blend of flavor, texture, and pure convenience. Roast Beef Sliders with Jus are rich, deeply comforting, and endlessly customizable to suit your crowd. They check every single box for appearance, taste, and ease of preparation. Whether it is game night, a busy weeknight dinner, or a large social feast—you are completely covered.
Here’s a quick mental checklist before you dive in:
- Got your rolls lightly toasted? ✅
- Mayo-horseradish spread perfectly mixed? ✅
- Beef, cheese, and sweet onions layered evenly? ✅
- Garlic butter-brush applied generously? ✅
- Savory jus simmered, strained, and piping hot? ✅
You now have everything you need to create sliders with serious, mouth-watering flavor impact. It’s time to get cooking and treat yourself and your guests to gourmet mini-sandwiches that will disappear faster than you can say “pass the jus.”
You May Also Like
Explore more delicious ideas for your next gathering: party appetizers, beef recipes, easy dinners, and game day food.
Source: Learn more about the culinary tradition of serving meat with its natural juices on Wikipedia.
Frequently Asked Questions
What is the best type of roast beef to use for sliders?
For the absolute best flavor and texture, use thinly sliced, freshly carved roast beef straight from the deli counter. It yields a much more tender bite and richer flavor profile compared to pre-packaged tub meats.
Can I make the homemade jus ahead of time?
Yes! You can easily prepare the jus up to 2 days in advance. Simply let it cool completely, store it in an airtight container in the refrigerator, and reheat it gently on the stovetop over low heat right before serving.
How do I keep the bottom buns from getting soggy?
The secret is in the prep! Lightly toasting the buns under the broiler before assembling the sliders creates a firm texture. Additionally, placing a layer of cheese directly on the bottom bun acts as a protective barrier against the meat’s moisture.
Final Thoughts
These Irresistible Roast Beef Sliders with Jus truly live up to their name, offering a winning combination of savory, tender beef, melty cheese, and a rich dipping sauce that will have everyone reaching for seconds. By utilizing simple ingredients and smart layering techniques, you can achieve a restaurant-quality appetizer right in your own kitchen.
Whether you are hosting a lively game day watch party, a casual family get-together, or just craving a comforting, quick weeknight dinner, this recipe delivers maximum flavor with minimal effort. Bring this ultimate party pleaser to your next event, and prepare for it to be the star of the show!