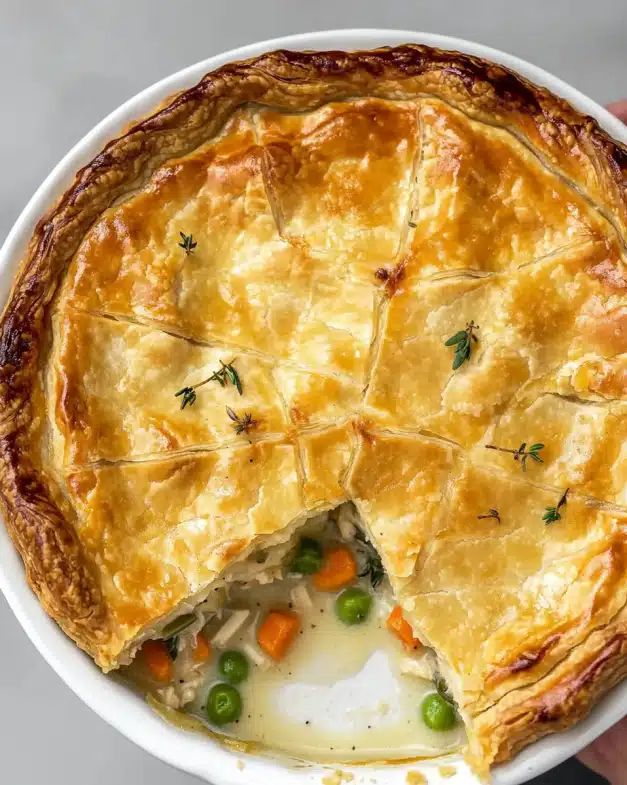
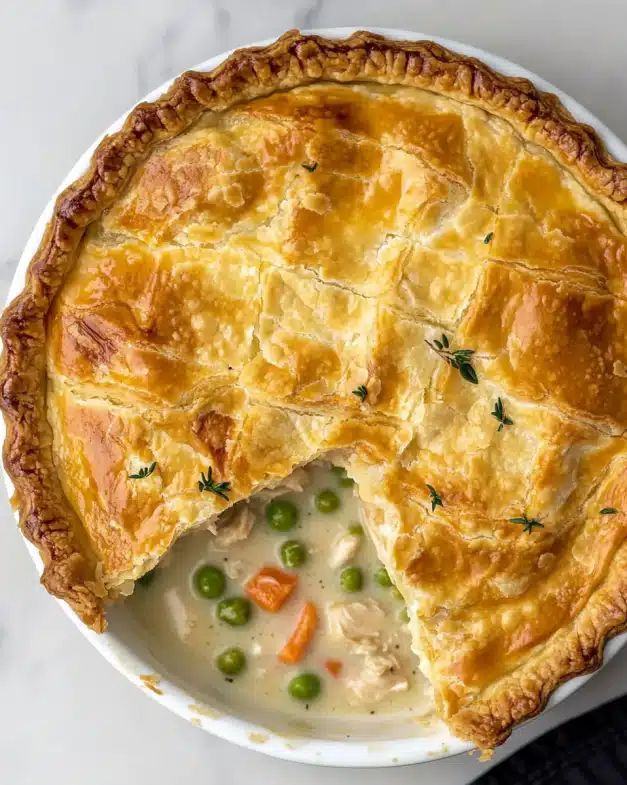
Imagine walking into your kitchen on a cool evening, the rich aroma of herbs and freshly baked crust filling the air. A golden, flaky chicken pot pie sits on the counter, bubbling with creamy chicken and vegetables. The first bite reveals layers of flavor—tender chicken, savory vegetables, and a perfectly seasoned, silky sauce, all encased in a buttery, melt-in-your-mouth crust.
This classic chicken pot pie recipe isn’t just a dish—it’s a comforting experience. Whether you’re preparing it for a weeknight dinner, a holiday meal, or a cozy gathering with family and friends, this recipe will quickly become a go-to comfort food. The beauty of this homemade pie lies in its simplicity, ease, and the joy it brings when shared with those you love.
In this article, you’ll learn how to make the perfect chicken pot pie from scratch—no need for store-bought filling or a ready-made crust. From the savory filling to the golden crust, we’ll break down every step, ensuring you end up with a delicious, satisfying dish that rivals any gourmet bakery.
Quick Answer: To make the perfect Classic Chicken Pot Pie, sauté chicken and aromatic vegetables in a butter-flour roux, stir in chicken broth and milk for a creamy filling, and bake inside a double pie crust at 425°F for 30-35 minutes until golden brown.
Essential Ingredients for the Perfect Chicken Pot Pie Filling
The heart of any great chicken pot pie is undoubtedly the filling. It is the component where all the individual flavors meld together to create a rich, savory blend that defines true comfort food. To achieve a professional-grade result at home, you need to focus on fresh aromatics, high-quality protein, and a perfectly balanced sauce.
Comprehensive Filling Ingredient List
Before you begin cooking, ensure you have all your components prepped and ready. This “mise en place” approach ensures the cooking process is smooth and your vegetables don’t overcook while you’re searching for spices.
| Ingredient Category | Specific Item | Recommended Amount |
|---|---|---|
| Protein | Boneless, skinless chicken | 1 pound |
| Aromatics | Small onion (finely chopped) | 1 medium unit |
| Vegetables | Carrots, Celery, Frozen Peas | 1 cup each |
| Thickener | Unsalted butter & All-purpose flour | ⅓ cup each |
| Liquids | Low-sodium chicken broth & Whole milk | 1½ cups & 1 cup |
| Seasoning | Dried thyme, Rosemary, Garlic | 1 tsp each / 3 cloves |
Expert Tips for Ingredient Selection
- Choosing your Chicken: While chicken breasts are classic, using chicken thighs provides a deeper flavor and stays much juicier during the high-heat baking process.
- The Herb Profile: Thyme and rosemary are the traditional backbone of pot pie flavor. If using fresh herbs instead of dried, triple the amount (3 teaspoons of fresh for every 1 teaspoon of dried).
- Texture Control: Using frozen peas is a strategic choice; they maintain their structural integrity and bright green color better than canned varieties.
How to Make the Chicken Pot Pie Filling From Scratch
Making the filling from scratch is the single best way to elevate your pie above store-bought versions. The secret lies in creating a roux—a cooked mixture of fat and flour—that serves as the thickening agent for your creamy sauce.
Step-by-Step Filling Instructions
- Sauté the Protein: In a large, heavy-bottomed skillet, melt ⅓ cup of unsalted butter over medium heat. Once the butter is bubbling, add your diced chicken. Cook for 5-7 minutes. You aren’t looking for deep browning here; just ensure the chicken is no longer pink on the exterior.
- Soften the Aromatics: Add the chopped onion, carrots, celery, and minced garlic. Stir frequently. This step allows the vegetables to release their natural sugars and flavors into the butter.
- Mastering the Roux: Sprinkle the flour evenly over the meat and vegetable mixture. Stir constantly for 2 minutes. Crucial Tip: Do not skip this cooking time, as it removes the “raw flour” taste from your final sauce.
- Building the Creamy Sauce: Gradually pour in the chicken broth and milk. Whisk or stir vigorously to incorporate the flour without creating lumps. Let it simmer for about 5 minutes until the liquid transforms into a thick, velvety gravy.
- Final Seasoning: Stir in the thyme, rosemary, salt, pepper, and finally the frozen peas. Remove from heat immediately to prevent the peas from becoming mushy.
Preparing and Perfecting the Pie Crust
A flaky, buttery crust provides the necessary textural contrast to the soft filling. Whether you are using a convenient store-bought dough or a homemade butter pastry, how you handle the dough determines the final quality of the pie.
Tips for a Professional Crust Finish
- Temperature is Key: Always keep your pie dough cold. If the butter in the crust melts before it hits the oven, you will lose those beautiful flaky layers.
- Preventing the “Soggy Bottom”: If you are worried about a damp lower crust, you can lightly brush the bottom dough with a beaten egg white before adding the filling. This creates a moisture barrier.
- The Golden Glaze: Always use an egg wash (one egg beaten with a tablespoon of water) on the top crust. This is what creates that iconic “bakery-style” shine and deep golden color.
Assembling and Baking Your Masterpiece
Assembly is where your hard work comes together. It requires a bit of finesse to ensure the pie is sealed correctly so the filling doesn’t leak out during the baking process.
Assembly Steps
- The Base Layer: Roll out your first crust and drape it over a 9-inch pie dish. Gently press it into the corners, being careful not to stretch or tear the dough.
- The Filling: Pour your cooled filling into the base. Pro Tip: Let the filling cool for at least 10 minutes before pouring; adding boiling hot filling directly to raw dough can melt the fats in the crust prematurely.
- Sealing the Pie: Place the second crust on top. Trim any excess hanging over the edge, then crimp the top and bottom layers together using a fork or your fingers.
- Venting: Use a sharp knife to cut 3-4 small slits in the center of the top crust. This allows steam to escape, preventing the crust from becoming soggy or exploding.
Baking Timeline and Temperatures
| Stage | Temperature | Time | What to Look For |
|---|---|---|---|
| Initial Bake | 425°F (218°C) | 20 Minutes | Crust beginning to turn pale gold. |
| Final Bake | 425°F (218°C) | 10-15 Minutes | Deep golden brown; filling bubbling through vents. |
| Resting | Room Temp | 10 Minutes | Sauce setting for easier slicing. |
Serving Suggestions and Storage Advice
While chicken pot pie is a complete meal on its own, pairing it with the right side dishes can transform it into a gourmet spread. Additionally, knowing how to handle leftovers ensures that none of that delicious pie goes to waste.
What to Serve with Pot Pie
- Acidic Balance: A crisp green salad with a lemon vinaigrette helps cut through the richness of the creamy sauce and buttery crust.
- Additional Texture: Roasted Brussels sprouts or honey-glazed carrots add a bit of crunch and sweetness to the meal.
- Classic Comfort: If you are serving a crowd, a side of garlic mashed potatoes is the ultimate indulgent pairing.
Storage and Reheating Best Practices
If you have leftovers, store them in an airtight container in the refrigerator for up to 3 days. To maintain the crispness of the crust when reheating, avoid the microwave if possible. Instead, place a slice in the oven at 350°F for about 15 minutes. This ensures the filling gets hot while the crust stays flaky.
Chef’s Secret: If you want to make this ahead of time, you can freeze the assembled (but unbaked) pie. When you’re ready to eat, bake it directly from frozen at 425°F, simply adding an extra 15-20 minutes to the total bake time.
You May Also Like
If you enjoyed this comforting meal, explore more of our favorites: Classic Comfort Foods, Easy Chicken Dinners, Homemade Pastry Tips, and Dinner Party Inspiration.
Authority Source: Learn more about the history of savory pies on Wikipedia.
Frequently Asked Questions
Can I make this chicken pot pie recipe vegetarian?
Yes! You can easily swap out the chicken for hearty vegetables such as mushrooms, extra potatoes, or tofu. Be sure to use vegetable broth instead of chicken broth to keep the entire dish vegetarian-friendly.
How do I prevent the bottom crust from getting soggy?
To ensure a crisp base, make sure your filling has cooled slightly before pouring it into the crust. You can also blind-bake the bottom crust for 10 minutes or brush it with a thin layer of beaten egg white to create a moisture barrier before adding the filling.
Can I freeze chicken pot pie for later?
Absolutely. You can freeze the pie either baked or unbaked. For the best results, assemble the pie but do not bake it; wrap it tightly in plastic wrap and aluminum foil. It will stay fresh in the freezer for up to 3 months. Bake directly from frozen, adding about 15 minutes to the standard baking time.
Final Thoughts
This classic chicken pot pie recipe is more than just a meal—it is a timeless comforting experience that brings warmth to any kitchen. By mastering the simple roux and perfecting the flaky crust, you can create a homemade masterpiece that far surpasses any store-bought alternative. It is the ultimate dish for sharing with family and friends on a chilly evening.
We hope this guide empowers you to bake with confidence. Gather your ingredients, preheat your oven, and enjoy the rich, savory flavors of a pie made completely from scratch. Don’t forget to experiment with your favorite herbs or vegetables to make this recipe truly your own!