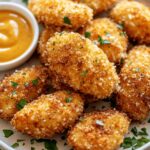
There’s something truly satisfying about biting into a crispy chicken tender—the audible crunch, the juicy interior, and that perfect burst of savory flavor. However, traditional fried tenders often come with a side of guilt, involving excessive oil, unwanted calories, and a messy kitchen. If you have been searching for a way to enjoy that classic comfort food without compromising your health, these crispy baked chicken tenders are the ultimate solution.
This recipe achieves a gourmet-level crunch by using a clever combination of finely crushed corn flakes and a tangy buttermilk marinade. By baking instead of frying, you get a golden, brittle crust that rivals any restaurant version, while keeping the meat incredibly tender and moist. It is the perfect harmony of texture and taste, designed to satisfy both picky kids and health-conscious adults alike.
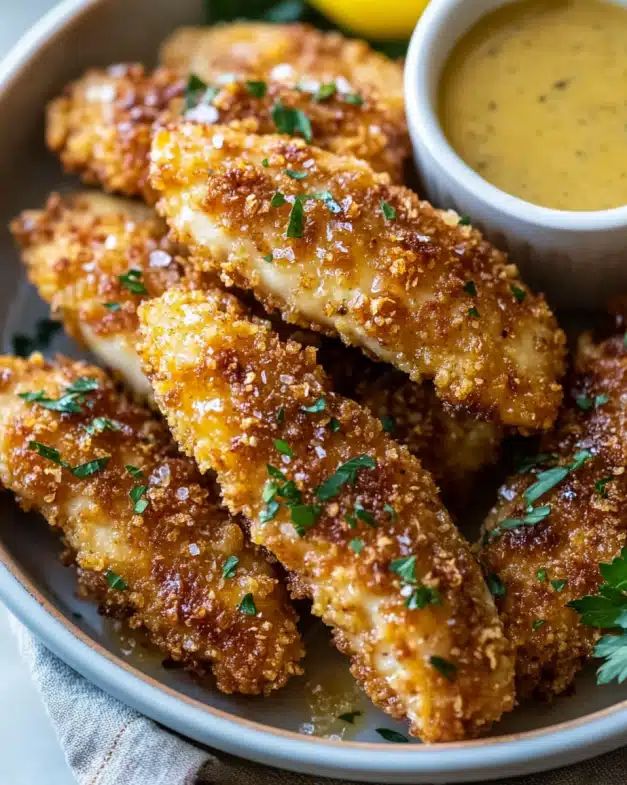
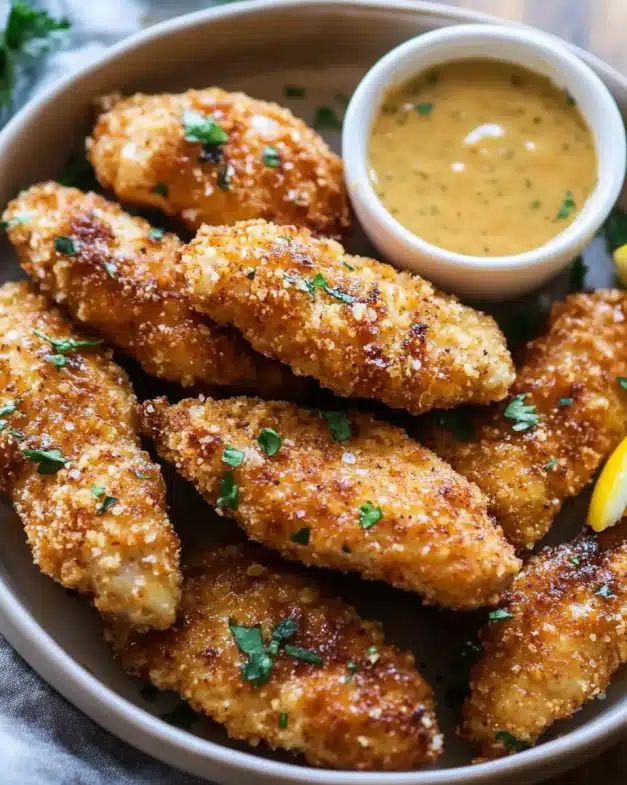
Beyond the chicken itself, we have paired this dish with an irresistible honey mustard dipping sauce that balances sharp Dijon with natural sweetness. Whether you are prepping a quick 35-minute weeknight meal or looking for a crowd-pleasing snack for game day, these tenders deliver on every front. Let’s look at how you can transform simple pantry staples into a high-protein, “fried-style” feast.
Quick Answer: To make crispy baked chicken tenders, marinate the chicken in buttermilk to ensure juiciness, then coat them in seasoned, crushed corn flakes for a superior crunch. Bake at 425°F (218°C) for 15-20 minutes until golden brown, and serve with a homemade honey mustard sauce for the perfect healthy comfort meal.
Why You’ll Love This Crispy Baked Chicken Tenders Recipe
Finding a balance between healthy eating and genuine comfort food is often a challenge. However, these crispy baked chicken tenders bridge that gap effortlessly. Instead of the heavy, oil-soaked batter found in traditional deep-frying, this recipe utilizes a high-heat baking technique and a unique crust that provides all the satisfaction with none of the lethargy that follows a greasy meal.
Whether you are a busy parent looking for a kid-approved weeknight dinner or someone trying to maintain a high-protein diet without getting bored, this recipe stands out for several reasons:
- Nutritionally Superior: By swapping deep-frying for baking, you significantly reduce the intake of saturated fats and unnecessary calories.
- Time-Efficient: With a total time of just 35 minutes, this meal fits perfectly into a hectic schedule.
- Superior Texture: The use of corn flakes creates a “shattering” crispness that breadcrumbs simply cannot replicate.
- Customizable Heat: You can easily adjust the spice level to suit your family’s preferences by toggling the cayenne pepper.

Beyond the health benefits, this recipe is a masterclass in flavor layering. We don’t just season the chicken; we season the marinade and the coating separately, ensuring that every single bite is packed with herbal freshness and savory depth.
Gather Your Ingredients: The Blueprint for Success
A great dish is only as good as its components. To ensure your chicken tenders come out perfectly golden and juicy, you need to gather specific ingredients that play distinct roles in the cooking process. Below is a detailed breakdown of everything required for both the chicken and the signature dipping sauce.
The Chicken and Crispy Coating
The secret to the “crunch” lies in the coating. While many recipes use Panko, we find that finely crushed corn flakes provide a more durable and satisfying texture when baked at high temperatures.
| Ingredient | Amount | Primary Function |
|---|---|---|
| Boneless chicken tenders | 2 pounds | Lean protein base; quick and even cooking. |
| Buttermilk | 1 cup | Tenderizes meat via mild acidity; acts as a “glue.” |
| Finely crushed corn flakes | 2 cups | Provides the signature ultra-crispy exterior. |
| Whole wheat or all-purpose flour | 2 tablespoons | Helps the coating bind to the chicken surface. |
| Dried Herbs (Chives, Parsley, Dill) | Various | Adds aromatic freshness and visual appeal. |
| Spices (Garlic & Onion Powder, Cayenne) | 1 tsp each | Builds a savory, complex flavor profile. |
| Extra virgin olive oil | For brushing | Promotes browning and prevents drying out. |
The Honey Mustard Dipping Sauce
No chicken tender is complete without a sidekick. This honey mustard sauce is emulsified to be creamy and tangy, cutting through the richness of the seasoned chicken.
| Ingredient | Amount | Taste Profile |
|---|---|---|
| Dijon mustard | ¼ cup | Sharp, pungent, and tangy. |
| Honey | ¼ cup | Smooth, floral sweetness. |
| Extra virgin olive oil | ¼ cup | Richness and silky mouthfeel. |
| Fresh lemon juice | ½ lemon | Bright acidity to balance the honey. |
| Cayenne & Salt/Pepper | To taste | Subtle heat and flavor enhancement. |
Step-by-Step Guide to Perfect Baked Tenders
Cooking is as much about technique as it is about ingredients. Follow these steps meticulously to ensure your tenders don’t turn out soggy or bland.

Step 1: The Buttermilk Marinade
Place your chicken tenders in a large zip-top bag or a shallow bowl. Pour the buttermilk over the chicken, ensuring every piece is fully submerged. The lactic acid in the buttermilk breaks down the protein fibers, resulting in a tender “melt-in-your-mouth” texture.
Pro Tip: For the best results, let the chicken marinate in the refrigerator for at least 30 minutes. If you have the time, 4 to 8 hours will yield the most succulent results you’ve ever experienced in a baked dish.
Step 2: Preheating and Prep
Preheat your oven to 425°F (218°C). A high temperature is essential; it shocks the coating into becoming crispy before the interior chicken has a chance to overcook and become dry. Line a large baking sheet with parchment paper or a silicone mat for easy cleanup.
Step 3: Preparing the Coating Mix
In a medium-sized bowl, whisk together the crushed corn flakes, flour, and your herb/spice blend (chives, parsley, dill, garlic powder, onion powder, cayenne, salt, and pepper). Ensure the spices are evenly distributed so that every bite of chicken has a consistent flavor profile.
Step 4: The Dredging Process
Remove a tender from the buttermilk, allowing the excess liquid to drip off. Press the chicken firmly into the corn flake mixture. Don’t be afraid to use some pressure; you want those flakes to really embed themselves into the meat. Place each tender on the baking sheet, leaving at least half an inch of space between them.
Step 5: The Olive Oil Drizzle and Bake
Using a pastry brush or an oil sprayer, lightly coat the top of the tenders with extra virgin olive oil. This step is non-negotiable—the oil is what facilitates the Maillard reaction, giving you that beautiful golden-brown color. Bake for 15–20 minutes. There is no need to flip them if you have a high-quality baking sheet, but a quick turn at the 10-minute mark ensures total uniformity.
Step 6: Emulsifying the Sauce
While the chicken is in the oven, combine your sauce ingredients in a small jar. Shake or whisk vigorously. You want the olive oil and mustard to emulsify, creating a thick, pourable sauce rather than a separated oily mess.
Baked vs. Fried: A Nutritional Comparison
If you are still on the fence about switching from fried to baked, let’s look at the hard data. Traditional deep-frying adds a significant amount of fat and empty calories to what is otherwise a very lean piece of meat.
| Metric (per serving) | Fried Tenders | Baked Tenders (Our Recipe) |
|---|---|---|
| Calories | 450–550 kcal | 280–320 kcal |
| Total Fat | 25g – 35g | 8g – 12g |
| Saturated Fat | 8g | 1.5g |
| Protein | 20g | 28g |
As the table illustrates, our baked version provides nearly double the protein-to-calorie ratio, making it an ideal choice for muscle recovery and long-term satiety.
Expert Tips for the Ultimate Crunch
To truly master this recipe, keep these “Chef’s Secrets” in mind during your next kitchen session:
- Air Circulation: If you have a wire cooling rack that is oven-safe, place it on top of your baking sheet and put the chicken on the rack. This allows hot air to circulate 360 degrees around the chicken, eliminating “soggy bottoms.”
- Don’t Overcrowd: If the tenders are touching, they will steam each other. Steam is the enemy of crispiness! Use two pans if necessary.
- Freshness Matters: While dried herbs are convenient, adding a tablespoon of fresh parsley to the final garnish provides a pop of color and a hit of vitamin C.
- The Flour Factor: The small amount of flour in the coating acts as a bridge between the wet buttermilk and the large corn flake crumbs. Do not skip it!

Serving Suggestions: Making it a Meal
While these tenders are great on their own, you can easily turn them into a full gourmet experience. Consider these pairings:
- The Classic Picnic: Serve alongside a tangy apple slaw and roasted sweet potato wedges.
- The Chicken Salad: Slice the warm tenders and place them over a bed of mixed greens, cherry tomatoes, and cucumbers, using the honey mustard as a dressing.
- The Wrap: Place two tenders inside a whole-wheat tortilla with avocado slices, spinach, and a drizzle of sauce for a portable lunch.

By focusing on high-quality ingredients and specific baking temperatures, you can enjoy a meal that feels like a “cheat day” but fits perfectly within your health goals. These crispy baked chicken tenders aren’t just a substitute for the real thing—they are a better, more flavorful version of it.
You May Also Like
If you enjoyed this recipe, you might find these other healthy dinner inspirations perfect for your next meal: Crispy Air Fryer Recipes, High-Protein Chicken Dinners, 30-Minute Weeknight Meals, and Homemade Gourmet Dipping Sauces.
For more information on the nutritional profile of lean poultry, visit the U.S. Department of Agriculture (USDA).
Frequently Asked Questions
Can I make these crispy chicken tenders gluten-free?
Yes, you can easily adapt this recipe. Simply substitute the all-purpose flour with a gluten-free all-purpose blend or rice flour. Ensure that the corn flakes you purchase are certified gluten-free, as some traditional brands use malt flavoring derived from barley.
What is the best way to reheat leftovers without them getting soggy?
To maintain that signature crunch, avoid the microwave. Instead, reheat the tenders in an oven or air fryer at 350°F (175°C) for about 5–8 minutes. This helps the coating crisp back up while keeping the interior juicy.
What can I use if I don’t have buttermilk on hand?
You can make a quick buttermilk substitute by adding 1 tablespoon of lemon juice or white vinegar to 1 cup of regular milk. Let the mixture sit for about 5 minutes until it curdles slightly before using it to marinate your chicken.
Final Thoughts
These crispy baked chicken tenders prove that you never have to choose between health and flavor. By utilizing the natural crunch of corn flakes and the tenderizing power of buttermilk, you can recreate a fast-food favorite in your own kitchen with significantly less fat and calories. It is a versatile recipe that fits perfectly into a balanced lifestyle while keeping the whole family satisfied.
Whether you are serving them as a main course, a salad topper, or a game-day snack, the combination of golden-brown coating and tangy homemade honey mustard is sure to make this a permanent fixture in your recipe rotation. Grab your baking sheet and enjoy the crunch!