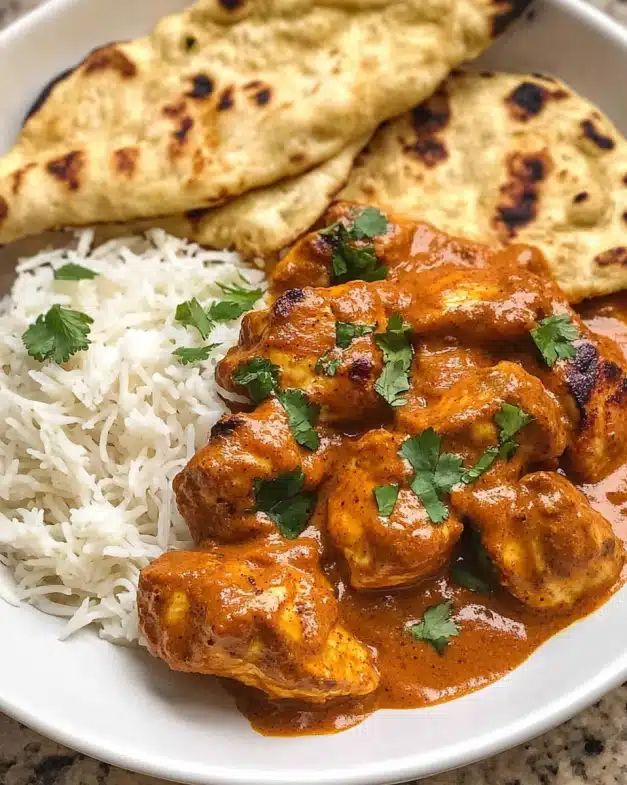
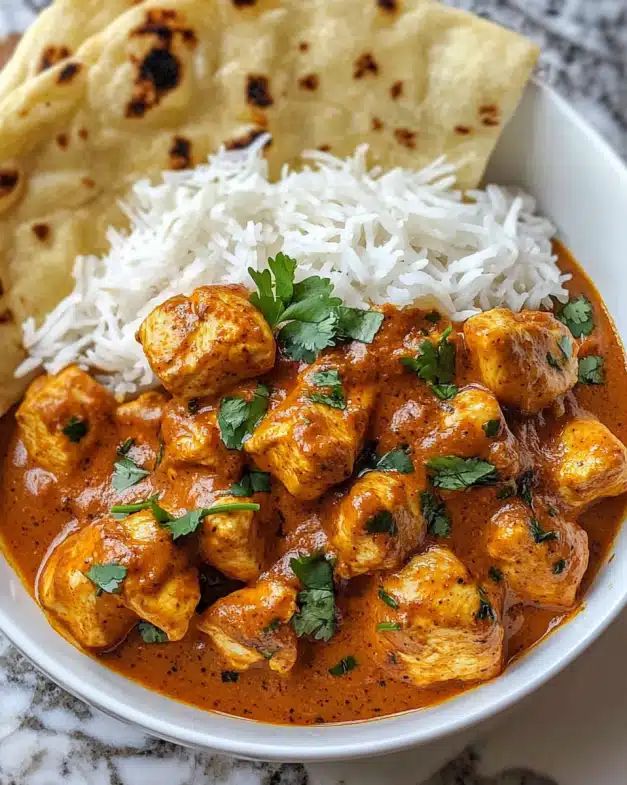
If you’ve ever craved a dish that wraps you in warmth, bursts with vibrant spices, and leaves your taste buds dancing, you’ve probably encountered Chicken Tikka Masala. This classic Indian favorite is more than just a meal—it’s an experience. Whether you’re a seasoned cook or just starting your culinary journey, mastering this flavorful chicken tikka masala recipe will transform your kitchen into a hub of rich aromas and unforgettable tastes.
In this comprehensive guide, you’ll discover everything you need to know to craft this iconic dish from scratch. From choosing the high-quality ingredients to perfecting every step of the cooking process, you’ll find clear, actionable advice tailored to your kitchen and palate. Ready to dive in? Let’s get started and indulge in gourmet dining at home.
Quick Answer: Authentic Chicken Tikka Masala consists of marinated, grilled chicken chunks (tikka) bathed in a creamy, spiced tomato-based sauce (masala). The key to its restaurant-quality flavor lies in a yogurt-based marinade and a silky, blended sauce finished with heavy cream and dried fenugreek leaves (kasoori methi).
What Is Chicken Tikka Masala? Understanding This Iconic Indian Dish
Before you jump into cooking, it’s helpful to understand what makes chicken tikka masala so beloved worldwide. Originating in the Indian subcontinent, this dish blends marinated chicken chunks (tikka) cooked in a creamy, spiced tomato sauce (masala). It’s believed to have been popularized in Britain by Indian chefs adapting traditional recipes to Western tastes, which explains its perfect balance of bold spices and creamy texture.
When you make authentic chicken tikka masala, you’re creating a dish celebrated for its complex layers of flavor—tender, juicy chicken infused with tangy yogurt marinade and enveloped in a luscious, aromatic sauce. This Indian chicken tikka masala is beloved for good reason: it’s comfort food that’s rich without being heavy, spicy without overwhelming, and elegant enough for special occasions.

Essential Ingredients for Authentic Chicken Tikka Masala
Creating a restaurant-quality Chicken Tikka Masala at home begins with understanding the dual components of the dish: the aromatic, tenderizing marinade and the luscious, velvety sauce. By using high-quality spices and fresh aromatics like ginger and garlic, you ensure a depth of flavor that pre-packaged sauces simply cannot replicate.
The Chicken Marinade: Foundation of Flavor
The first step to success is the “tikka” or the grilled chicken pieces. A yogurt-based marinade is essential because the lactic acid in the yogurt gently breaks down the muscle fibers, resulting in incredibly tender meat. Use boneless, skinless chicken thighs for the juiciest results, though breasts are a fine leaner alternative.
| Ingredient | Quantity | Purpose |
|---|---|---|
| Chicken (Thighs or Breasts) | 28 oz | The protein base, cut into bite-sized pieces. |
| Plain Yogurt | 1/2 cup | Tenderizes the meat and carries the spices. |
| Minced Garlic & Ginger | 2.5 tbsp total | Provides the sharp, aromatic foundation. |
| Garam Masala | 2 tsp | Adds warmth and “floral” spice notes. |
| Turmeric & Cumin | 1 tsp each | Earthiness and vibrant golden color. |
| Red Chili Powder & Salt | 1 tsp each | Heat and essential seasoning. |
The Masala Sauce: A Creamy Masterpiece
The sauce is where the “magic” happens. It requires a balance of acidity from tomatoes, sweetness from a touch of sugar, and richness from heavy cream. The secret ingredient, Kasoori Methi (dried fenugreek leaves), provides that unmistakable “restaurant smell” and a slightly nutty, maple-like undertone.
- Healthy Fats: A combination of Ghee (clarified butter) and oil allows for high-heat cooking without burning, adding a buttery depth.
- Aromatic Base: Sliced onions, slowly sautéed, provide the body and natural sweetness of the gravy.
- Texture Secret: Crushed tomatoes offer a consistent base, which is later blended to achieve a professional, silky texture.
Step-by-Step Culinary Guide: Mastering the Process
Follow these meticulously designed steps to ensure your homemade Indian comfort food turns out perfectly. Each phase is designed to build layers of flavor that culminate in a complex, satisfying profile.
Step 1: The Marination Phase
Combine your chicken with the yogurt and spices. Do not rush this process. While 30 minutes works in a pinch, overnight marination allows the spices to penetrate deep into the meat. Ensure every piece of chicken is thoroughly coated in the thick, spiced yogurt mixture.
Step 2: Searing for Success
Heat olive oil in a heavy-bottomed skillet. You want the pan to be hot enough that the chicken sizzles immediately upon contact. Crucial Tip: Cook the chicken in batches. If the pan is overcrowded, the chicken will steam in its own juices rather than developing a charred, golden-brown crust. We aren’t looking to cook it through yet—just to develop flavor via the Maillard reaction.
Step 3: Building the Aromatic Base
After removing the chicken, add your ghee or butter to the same pan. This picks up the “fond” (the brown bits) left by the chicken. Sauté your onions until they are translucent and just beginning to brown. Add the fresh ginger and garlic at the very end of this process to prevent them from burning, which can turn the sauce bitter.
Step 4: Blooming the Spices and Simmering
Add your dry spices (Cumin, Garam Masala, Coriander) and stir for exactly 20 seconds. This is called “blooming”—it releases the essential oils in the spices. Quickly pour in the crushed tomatoes to stop the spices from burning. Let this mixture simmer for 10–15 minutes until the oil starts to separate from the tomato base, indicating it is properly cooked.
Step 5: The Professional Silky Finish
For a truly world-class SEO-worthy recipe, texture is key. Carefully transfer your sauce to a blender. Blend until it is completely smooth. If the sauce feels too thick, a splash of water will help it move. Return the liquid gold to your pan and stir in the heavy cream and sugar. The color will transform from a deep red to a beautiful, bright orange.
Expert Tips for the Perfect Homemade Curry
Even with the best instructions, these professional nuances can elevate your dish from “good” to “unforgettable.”
- Quality of Spices: If your spices have been sitting in the pantry for over a year, they’ve lost their potency. Buy fresh Garam Masala for this recipe.
- Heat Control: If the sauce is too spicy, add more cream or a bit more sugar. If it’s too bland, a squeeze of fresh lemon juice at the end can brighten the flavors.
- The Fenugreek Factor: Don’t skip the Kasoori Methi. Crush the dried leaves between your palms before sprinkling them into the sauce to activate their aroma.
Pro Insight: If you want a smoky flavor similar to a traditional tandoor oven, you can slightly char your chicken under a broiler (grill) for 2–3 minutes after pan-searing.
Storage and Reheating
Like many stews and curries, Chicken Tikka Masala often tastes better the next day as the flavors continue to meld. Proper storage is essential for maintaining the quality of the cream-based sauce.
| Method | Duration | Reheating Tip |
|---|---|---|
| Refrigeration | 3–4 Days | Heat on low to prevent the cream from separating. |
| Freezing | Up to 3 Months | Thaw completely in the fridge before reheating. |

Complementary Sides: Completing the Experience
To serve your authentic Indian comfort food properly, you need the right accompaniments. The sauce is so flavorful that it begs for a neutral, absorbent side.
Basmati Rice vs. Naan Bread
Ideally, you serve both! Basmati rice should be fluffy and separate, perhaps scented with a few cardamom pods or a bay leaf. Naan bread, especially garlic naan, is the perfect vessel for scooping up the extra tikka masala sauce. If you’re looking for a lighter option, steamed cauliflower rice or a simple cucumber raita (yogurt dip) provides a refreshing contrast to the rich, warm spices of the curry.
You May Also Like
If you enjoyed this authentic Indian comfort food, you might find these other recipes and guides perfect for your next kitchen adventure: Cajun Shrimp Pasta, Cheesy Chicken Casseroles, and Easy Weeknight Dinner Ideas.
For a deeper look into the cultural origins and global popularity of this dish, visit: Chicken Tikka Masala on Wikipedia.
Frequently Asked Questions
What is the difference between Chicken Tikka and Chicken Tikka Masala?
Chicken Tikka refers to boneless pieces of chicken that have been marinated in yogurt and spices and then grilled or roasted. Chicken Tikka Masala takes those same grilled chicken pieces and simmers them in a rich, creamy tomato-based sauce to create a complete curry dish.
Can I make this recipe dairy-free?
Yes, you can easily adapt this into a dairy-free chicken tikka masala. Simply substitute the plain yogurt in the marinade with a dairy-free alternative like coconut yogurt. For the sauce, replace the heavy cream with full-fat coconut milk or cashew cream to maintain that signature velvety texture.
How can I make the sauce smoother and more like a restaurant?
The “restaurant secret” is two-fold: First, ensure you blend the sauce base (onions and tomatoes) until it is completely liquid before adding the cream. Second, always pass the sauce through a fine-mesh strainer after blending if you want a truly silky, professional finish without any small vegetable fragments.
Final Thoughts
Mastering this flavorful chicken tikka masala recipe is a rewarding journey into the heart of Indian-inspired comfort food. By taking the time to marinate the chicken properly and blooming your spices, you create a depth of flavor that rivals the best restaurants. Whether you are serving this for a cozy family dinner or a festive gathering, it is a dish that never fails to impress and satisfy.
Now that you have the tools and tips to succeed, it’s time to head to the kitchen and start cooking! Don’t forget to serve your masterpiece with plenty of warm naan and fluffy basmati rice to soak up every drop of that delicious, creamy sauce. Happy cooking from the team at Cook With Feast!