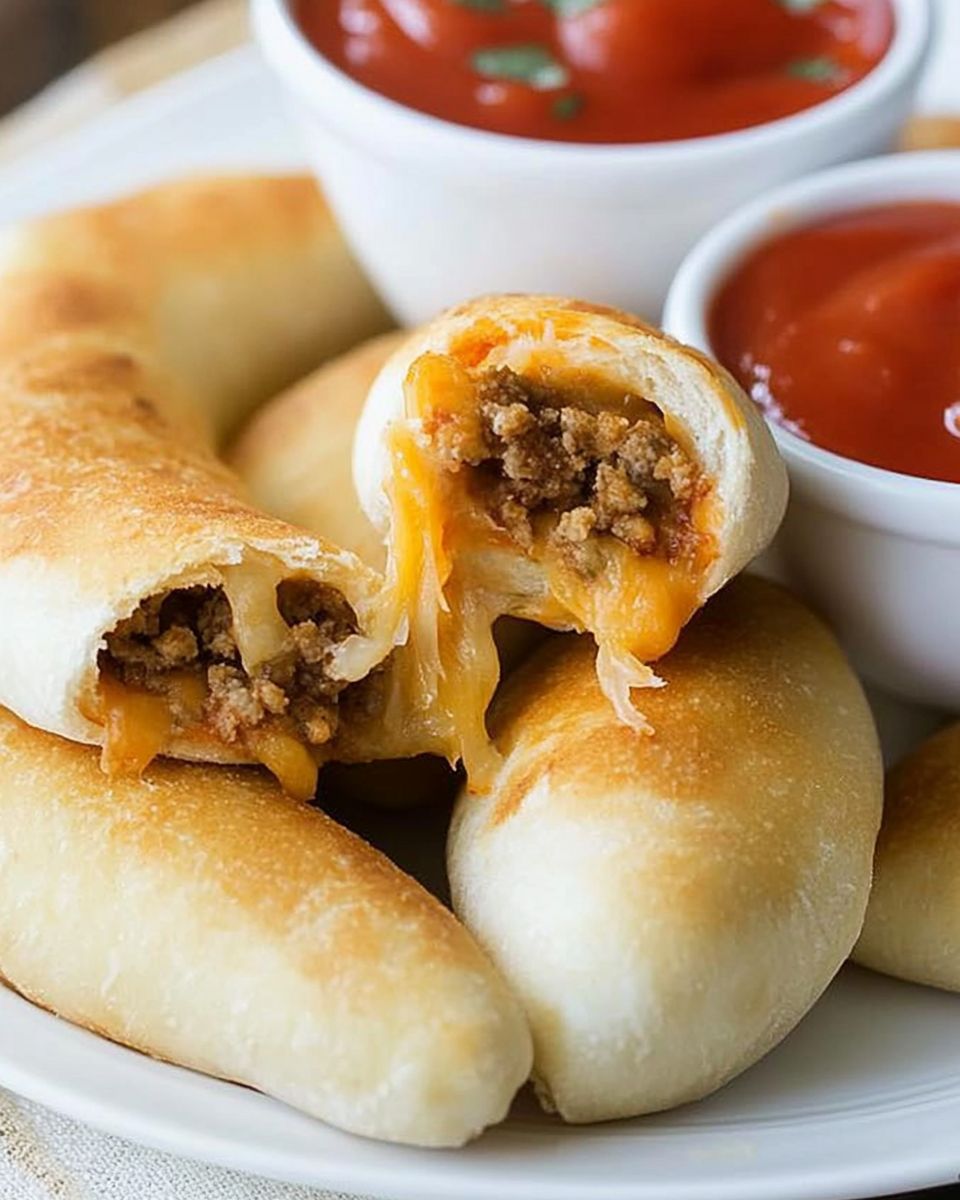
Cheesy Taco Sticks are a savory twist on classic taco night, blending the bold flavors of seasoned taco beef and melty cheese, all wrapped in fluffy, golden pizza dough. These hand-held taco sticks are baked to a crispy finish, creating a snack or meal that is easy to make, easy to eat, and easy to love. Whether you are looking for a fun new dinner idea or a crowd-pleasing appetizer, this recipe delivers maximum flavor with minimal effort.
Whether you are hosting a party, preparing lunch for your kids, or just craving something indulgent and flavorful, these Cheesy Taco Sticks are your new go-to. They offer all the classic taco taste you crave—savory beef, rich cheese, and zesty seasonings—packed into a self-contained, mess-free package. Plus, using pre-made pizza dough helps you save time in the kitchen without sacrificing taste or texture, making this the perfect solution for busy weeknights.
Quick Answer: Cheesy Taco Sticks are a fast, kid-friendly meal made by wrapping seasoned ground beef and Colby Jack cheese sticks in refrigerated pizza dough. They are brushed with a savory garlic butter topping and baked at 425°F for 12–14 minutes until golden brown and puffed.
Why You’ll Love This Recipe
There is a reason why Cheesy Taco Sticks have become a staple in modern family kitchens. Beyond the obvious appeal of combining pizza dough with taco filling, this recipe hits the “sweet spot” of weeknight cooking: it is fast, affordable, and universally liked. Here is why this recipe deserves a permanent spot in your meal rotation:
- Efficiency at its Best: From the moment you open the fridge to the moment you serve dinner, you are looking at less than 30 minutes. The use of pre-made dough cuts prep time in half.
- The “Picky Eater” Solution: Kids love anything they can eat with their hands. The self-contained nature of these sticks means less mess than traditional tacos and more fun at the dinner table.
- Meal Prep Gold: These bake up beautifully, but they also freeze exceptionally well. You can make a double batch on Sunday and have grab-and-go lunches for the rest of the week.
- Budget-Friendly: With simple ingredients like ground beef and canned dough, this is a wallet-friendly meal that feeds a crowd without breaking the bank.
Preparation Phase and Tools to Use
Cooking is always more enjoyable when you are organized. For this recipe, having the right equipment ensures your taco sticks bake evenly and seal tightly. While you do not need a professional kitchen, a few specific tools will make the process seamless.
Essential Tools Breakdown
We have compiled a list of the equipment you should have ready on your counter before you start cooking:

| Tool | Why It Is Crucial |
|---|---|
| Nonstick Skillet | Ensures the ground beef browns evenly without sticking, making cleanup easier. |
| Parchment Paper | The secret to a golden bottom without burning; it also prevents the dough from sticking to the pan. |
| Pizza Cutter | Much faster and more precise than a knife for cutting the dough into uniform squares. |
| Pastry Brush | Essential for applying the garlic butter evenly to every nook and cranny of the dough. |
Chef’s Tip: If you do not have a rolling pin to stretch the dough, a clean wine bottle works in a pinch! However, usually, gentle stretching by hand is sufficient for this recipe.
Ingredients List & Sourcing
The beauty of these Cheesy Taco Sticks lies in the simplicity of the ingredients. However, choosing the right components can elevate the flavor from “good” to “unforgettable.” Here is exactly what you need.
The Core Components
- Lean Ground Beef (1 lb): We recommend using 90/10 or 85/15 beef. This ensures you get that savory beef flavor without excessive grease, which can make the dough soggy.
- Refrigerated Pizza Dough (2 cans): Pillsbury is the standard choice here. It offers a consistent texture and puffs up perfectly in the oven.
- Colby Jack Cheese Sticks (12 count): The marbleization of Colby and Monterey Jack offers the perfect melt factor. String cheese (mozzarella) is a good backup, but Colby Jack adds more flavor.
- Taco Seasoning (1 packet): You can use a standard packet or a homemade blend of chili powder, cumin, paprika, and onion powder.
The Garlic Butter Finish
Do not skip this step! The topping is what gives these sticks their bakery-style finish.
- Unsalted Butter (¼ cup): Melted down to act as the base.
- Garlic Powder (1 tsp): distinct and punchy flavor that pairs well with the beef.
- Dried Parsley (1 tsp): Adds a pop of color and a subtle herby note.
Step-by-Step Directions
Follow these steps to ensure your taco sticks come out crispy, golden, and sealed tight. Precision in the assembly process is key to preventing the cheese from leaking out.
Phase 1: The Filling
- Preheat and Prep: Start by preheating your oven to 425°F (220°C). Line two large baking sheets with parchment paper. This high heat is necessary to puff the dough quickly.
- Brown the Beef: Place a large skillet over medium-high heat. Add the ground beef and cook for 5–7 minutes. Break the meat apart with a wooden spoon as it cooks until it is fully browned and no pink remains.
- Season the Meat: Drain the excess grease from the pan—this is crucial to prevent soggy dough. Return the meat to the heat, add the minced garlic, taco seasoning packet, and the amount of water specified on the packet. Simmer for 2–3 minutes until the sauce thickens and coats the meat. Remove from heat.
Phase 2: Assembly
- Prepare the Dough: Unroll one can of pizza dough onto a clean, flat surface or directly onto your parchment paper. Gently stretch it into a 12×8-inch rectangle. Using a pizza cutter, slice the dough into six equal squares (roughly 4×4 inches each). Repeat with the second can.
- Fill the Squares: Spoon approximately 3 tablespoons of the taco meat mixture into the center of each square. Be careful not to overfill, as this makes sealing difficult.
- Add the Cheese: Cut each cheese stick in half. Place one half-stick directly on top of the meat mound in the center of the dough.
- Fold and Seal: This is the most important step. Pull the corners of the dough up over the filling. Pinch the seams together tightly to create a sealed pocket. Roll it gently between your hands to smooth it out, then place it seam-side down on the baking sheet.
Phase 3: Baking
- Apply the Topping: In a small microwave-safe bowl, melt the butter. Stir in the garlic powder and dried parsley. Use a pastry brush to generously coat the top of each taco stick.
- Bake to Perfection: Place the baking sheets in the oven and bake for 12–14 minutes. You are looking for a deep golden-brown color on top.
- Cool and Serve: Let them cool for about 3-5 minutes before serving (the cheese inside will be molten hot!). Serve with your favorite dipping sauces.
Serving Suggestions and Pairings
While these Cheesy Taco Sticks are delicious on their own, the right sides and dips turn them into a fiesta. Because the sticks are rich and savory, you want to pair them with fresh, acidic, or creamy elements.
Top Dipping Sauces
- Sour Cream & Chive: The coolness of the sour cream balances the hot, spicy taco meat.
- Chunky Salsa or Pico de Gallo: Adds a fresh vegetable crunch and acidity.
- Queso Dip: For the ultimate cheese lover, dip your cheese-filled stick into more cheese.
- Guacamole: Rich, creamy, and adds a nice color contrast to the plate.
Perfect Side Dishes
If you are serving this for dinner, consider these sides to round out the nutritional profile:
| Side Dish | Why It Works |
|---|---|
| Mexican Street Corn (Elote) | Sweet corn balances the savory beef; chili powder ties the flavors together. |
| Cilantro Lime Rice | A light, fluffy starch that soaks up any extra sauce or dip. |
| Black Bean Salad | Adds fiber and freshness with ingredients like corn, peppers, and lime vinaigrette. |
Common Mistakes to Avoid
Even the simplest recipes have pitfalls. To ensure your Cheesy Taco Sticks come out Instagram-ready every time, watch out for these common errors.
1. The “Soggy Bottom” Issue
This usually happens for two reasons: either the grease wasn’t drained from the beef, or the meat mixture was too wet. Ensure you simmer the taco meat long enough for the water to evaporate, creating a thick, coating sauce rather than a soup.
2. The “Cheese Explosion”
If your cheese is oozing out onto the pan, the seal wasn’t tight enough. When pinching the dough, use a firm touch. Placing the stick seam-side down uses the weight of the taco stick to keep it closed during the baking process.
3. Working with Warm Dough
Pizza dough becomes sticky and difficult to handle as it warms up. Keep the cans in the refrigerator until the very last second. If the dough gets too sticky while you are working, pop it back in the fridge for 10 minutes.
Why You’ll Love This Recipe
There is a reason why Cheesy Taco Sticks have become a staple in modern family kitchens. Beyond the obvious appeal of combining pizza dough with taco filling, this recipe hits the “sweet spot” of weeknight cooking: it is fast, affordable, and universally liked. Here is why this recipe deserves a permanent spot in your meal rotation:
- Efficiency at its Best: From the moment you open the fridge to the moment you serve dinner, you are looking at less than 30 minutes. The use of pre-made dough cuts prep time in half.
- The “Picky Eater” Solution: Kids love anything they can eat with their hands. The self-contained nature of these sticks means less mess than traditional tacos and more fun at the dinner table.
- Meal Prep Gold: These bake up beautifully, but they also freeze exceptionally well. You can make a double batch on Sunday and have grab-and-go lunches for the rest of the week.
- Budget-Friendly: With simple ingredients like ground beef and canned dough, this is a wallet-friendly meal that feeds a crowd without breaking the bank.
Preparation Phase and Tools to Use
Cooking is always more enjoyable when you are organized. For this recipe, having the right equipment ensures your taco sticks bake evenly and seal tightly. While you do not need a professional kitchen, a few specific tools will make the process seamless.
Essential Tools Breakdown
We have compiled a list of the equipment you should have ready on your counter before you start cooking:
| Tool | Why It Is Crucial |
|---|---|
| Nonstick Skillet | Ensures the ground beef browns evenly without sticking, making cleanup easier. |
| Parchment Paper | The secret to a golden bottom without burning; it also prevents the dough from sticking to the pan. |
| Pizza Cutter | Much faster and more precise than a knife for cutting the dough into uniform squares. |
| Pastry Brush | Essential for applying the garlic butter evenly to every nook and cranny of the dough. |
Chef’s Tip: If you do not have a rolling pin to stretch the dough, a clean wine bottle works in a pinch! However, usually, gentle stretching by hand is sufficient for this recipe.
Ingredients List & Sourcing
The beauty of these Cheesy Taco Sticks lies in the simplicity of the ingredients. However, choosing the right components can elevate the flavor from “good” to “unforgettable.” Here is exactly what you need.
The Core Components
- Lean Ground Beef (1 lb): We recommend using 90/10 or 85/15 beef. This ensures you get that savory beef flavor without excessive grease, which can make the dough soggy.
- Refrigerated Pizza Dough (2 cans): Pillsbury is the standard choice here. It offers a consistent texture and puffs up perfectly in the oven.
- Colby Jack Cheese Sticks (12 count): The marbleization of Colby and Monterey Jack offers the perfect melt factor. String cheese (mozzarella) is a good backup, but Colby Jack adds more flavor.
- Taco Seasoning (1 packet): You can use a standard packet or a homemade blend of chili powder, cumin, paprika, and onion powder.
The Garlic Butter Finish
Do not skip this step! The topping is what gives these sticks their bakery-style finish.
- Unsalted Butter (¼ cup): Melted down to act as the base.
- Garlic Powder (1 tsp): distinct and punchy flavor that pairs well with the beef.
- Dried Parsley (1 tsp): Adds a pop of color and a subtle herby note.
Step-by-Step Directions
Follow these steps to ensure your taco sticks come out crispy, golden, and sealed tight. Precision in the assembly process is key to preventing the cheese from leaking out.
Phase 1: The Filling
- Preheat and Prep: Start by preheating your oven to 425°F (220°C). Line two large baking sheets with parchment paper. This high heat is necessary to puff the dough quickly.
- Brown the Beef: Place a large skillet over medium-high heat. Add the ground beef and cook for 5–7 minutes. Break the meat apart with a wooden spoon as it cooks until it is fully browned and no pink remains.
- Season the Meat: Drain the excess grease from the pan—this is crucial to prevent soggy dough. Return the meat to the heat, add the minced garlic, taco seasoning packet, and the amount of water specified on the packet. Simmer for 2–3 minutes until the sauce thickens and coats the meat. Remove from heat.
Phase 2: Assembly
- Prepare the Dough: Unroll one can of pizza dough onto a clean, flat surface or directly onto your parchment paper. Gently stretch it into a 12×8-inch rectangle. Using a pizza cutter, slice the dough into six equal squares (roughly 4×4 inches each). Repeat with the second can.
- Fill the Squares: Spoon approximately 3 tablespoons of the taco meat mixture into the center of each square. Be careful not to overfill, as this makes sealing difficult.
- Add the Cheese: Cut each cheese stick in half. Place one half-stick directly on top of the meat mound in the center of the dough.
- Fold and Seal: This is the most important step. Pull the corners of the dough up over the filling. Pinch the seams together tightly to create a sealed pocket. Roll it gently between your hands to smooth it out, then place it seam-side down on the baking sheet.
Phase 3: Baking
- Apply the Topping: In a small microwave-safe bowl, melt the butter. Stir in the garlic powder and dried parsley. Use a pastry brush to generously coat the top of each taco stick.
- Bake to Perfection: Place the baking sheets in the oven and bake for 12–14 minutes. You are looking for a deep golden-brown color on top.
- Cool and Serve: Let them cool for about 3-5 minutes before serving (the cheese inside will be molten hot!). Serve with your favorite dipping sauces.
Serving Suggestions and Pairings
While these Cheesy Taco Sticks are delicious on their own, the right sides and dips turn them into a fiesta. Because the sticks are rich and savory, you want to pair them with fresh, acidic, or creamy elements.
Top Dipping Sauces
- Sour Cream & Chive: The coolness of the sour cream balances the hot, spicy taco meat.
- Chunky Salsa or Pico de Gallo: Adds a fresh vegetable crunch and acidity.
- Queso Dip: For the ultimate cheese lover, dip your cheese-filled stick into more cheese.
- Guacamole: Rich, creamy, and adds a nice color contrast to the plate.
Perfect Side Dishes
If you are serving this for dinner, consider these sides to round out the nutritional profile:
| Side Dish | Why It Works |
|---|---|
| Mexican Street Corn (Elote) | Sweet corn balances the savory beef; chili powder ties the flavors together. |
| Cilantro Lime Rice | A light, fluffy starch that soaks up any extra sauce or dip. |
| Black Bean Salad | Adds fiber and freshness with ingredients like corn, peppers, and lime vinaigrette. |
Common Mistakes to Avoid
Even the simplest recipes have pitfalls. To ensure your Cheesy Taco Sticks come out Instagram-ready every time, watch out for these common errors.
1. The “Soggy Bottom” Issue
This usually happens for two reasons: either the grease wasn’t drained from the beef, or the meat mixture was too wet. Ensure you simmer the taco meat long enough for the water to evaporate, creating a thick, coating sauce rather than a soup.
2. The “Cheese Explosion”
If your cheese is oozing out onto the pan, the seal wasn’t tight enough. When pinching the dough, use a firm touch. Placing the stick seam-side down uses the weight of the taco stick to keep it closed during the baking process.
3. Working with Warm Dough
Pizza dough becomes sticky and difficult to handle as it warms up. Keep the cans in the refrigerator until the very last second. If the dough gets too sticky while you are working, pop it back in the fridge for 10 minutes.