Mexican Birria is an iconic dish deeply rooted in the culinary traditions of Jalisco, Mexico, celebrated worldwide for its complex, savory profile. Known for its melt-in-your-mouth tender meat and bold, smoky flavors derived from a blend of dried chilies and aromatic spices, birria is a labor of love that delivers an unforgettable taste experience. Whether you enjoy it as a comforting, soul-warming soup or as the filling for the famous “quesabirria” tacos dipped in rich consomé, this dish is universally loved for its versatility and depth.

While traditional recipes often use goat or lamb, this version is adaptable for beef, creating a rich and hearty meal that brings the restaurant experience right into your home kitchen. The magic lies in the slow cooking process, which allows the meat to absorb the essence of the chili-based marinade, resulting in a dish that is perfect for special occasions, family gatherings, or simply satisfying a craving for authentic Mexican comfort food. Best of all, this recipe is naturally gluten-free and dairy-free, making it accessible to a wide range of dietary needs without sacrificing an ounce of flavor.
Quick Answer: Mexican Birria is a savory, sweet, mild-to-spicy stew traditionally made from goat, beef, or lamb. It is slow-cooked in a broth (consomé) made from dried chilies (like guajillo and ancho), garlic, cumin, thyme, and oregano. It is famously served two ways: as a stew (en caldo) or as a filling for tacos (tacos de birria), often dipped in the cooking broth.
Why You’ll Fall in Love with This Authentic Birria
There is a reason why Mexican Birria has exploded in popularity across social media and restaurant menus worldwide. It is the ultimate comfort food that manages to be both sophisticated in flavor and humble in its roots. This recipe is designed to bring that authentic, street-style experience into your home kitchen, ensuring you don’t just make dinner, but create a culinary memory.
- Unmatched Versatility: This single recipe serves two distinct purposes. You can enjoy it as a traditional, soul-warming stew (birria en caldo) served in deep bowls with fresh onion and cilantro, or you can transform it into the famous crispy red tacos (quesabirria) that are dipped in the rich broth.
- Naturally Healthy & Inclusive: In a world of complex dietary restrictions, this recipe shines. It is naturally gluten-free and dairy-free, relying on the richness of the chilies and meat rather than thickeners or creams to achieve its velvety texture.
- Texture Heaven: The slow-cooking process breaks down the collagen in the meat, resulting in protein that shreds effortlessly with a fork, while the broth becomes gelatinous and rich.
- Aromatic Experience: The combination of cinnamon, ginger, and cloves creates a scent that will fill your home with an inviting warmth, perfect for chilly evenings or Sunday family dinners.
A Deep Dive into the Ingredients
The secret to a world-class birria de res (beef birria) or traditional goat birria lies in the quality and selection of the dried chilies. These are not just for heat; they provide the base body, color, and fruitiness of the sauce. Understanding your chilies is the first step to mastery.

The “Holy Trinity” of Birria Chilies
This recipe utilizes a specific blend of dried peppers to achieve a balanced flavor profile that is neither too spicy nor too bland. Here is a breakdown of what each pepper contributes to the pot:
| Chili Variety | Flavor Profile | Heat Level | Role in Recipe |
|---|---|---|---|
| Guajillo | Bright, tangy, slight berry notes | Mild to Medium | Provides the vibrant red color and acidic brightness. |
| Ancho | Deep, sweet, raisin-like, smoky | Mild | Adds body, thickness, and dark earthy undertones. |
| Chile de Árbol | Sharp, clean heat, nutty | Hot | Optional strictly for controlling the spice level (the “kick”). |
Selecting the Meat
While this recipe calls for lamb shoulder for a traditional flavor, the beauty of the marinade is that it works exceptionally well with various cuts of beef. If you prefer beef, opt for cuts that are high in connective tissue and marbling.
- Beef Shank (Chamorro): The bone marrow adds incredible richness to the stock.
- Chuck Roast: Readily available and offers a great balance of meat and fat.
- Short Ribs: Expensive, but they provide the most tender, melt-in-your-mouth texture.
Preparation Phase: Tools & Mise en Place
Before you turn on the stove, ensure your kitchen is prepped. Birria is a process of layering flavors, and having the right equipment ensures a smooth workflow.
Essential Equipment Checklist:
- Dutch Oven or Heavy Pot: Essential for heat retention during the long simmer.
- High-Speed Blender: Crucial for pulverizing the tough skins of the dried chilies into a silky smooth sauce.
- Fine Mesh Sieve: If your blender isn’t high-powered, you will need this to strain the sauce for a refined texture.
- Cast Iron Skillet: For toasting the chilies and aromatics.
Step-by-Step Cooking Instructions
Follow this guide to build the layers of flavor that make this dish iconic. Do not rush the toasting or marinating steps, as they are foundational to the end result.
Step 1: Toasting and Rehydrating the Chilies
The first step is to wake up the oils in the dried peppers. Remove the stems and seeds from the Guajillo and Ancho peppers. Heat a dry pan over medium heat and toast them for 1-2 minutes per side. Watch them closely: dried chilies can turn from toasted to burnt in seconds, and burnt chilies will make your entire sauce bitter. Once toasted, submerge them in hot water for 20 minutes until they are pliable and soft.
Step 2: Building the Aromatic Base
While the chilies soak, use the same pan to sauté your white onion and fresh tomatoes in olive oil. You want a bit of char on them to mimic the flavor of roasted vegetables. Add the garlic in the last minute of cooking to prevent it from burning. This step adds a sweetness that balances the acidity of the chilies.
Step 3: Creating the Adobo (The Sauce)
This is where the magic happens. In your blender, combine:
- The rehydrated chilies (add a splash of the soaking liquid if you like earthy flavors, or use fresh water for a cleaner taste).
- The sautéed onion, tomato, and garlic mixture.
- Spices: Mexican oregano, cumin, cinnamon, ginger, black pepper, and sea salt.
- Liquids: Apple cider vinegar (for tenderizing) and 1 cup of beef stock.
Blend on high until completely smooth. If the mixture looks grainy, pass it through a sieve. You want a thick, velvety red paste.
Pro Tip: Taste your adobo sauce before adding it to the raw meat. It should be slightly saltier and more acidic than you think is necessary, as it will dilute significantly once the meat juices and remaining stock are added.
Step 4: The Marination
Massage the red chili sauce into your chunks of meat. Ensure every crevice is covered. For the absolute best results, let this sit in the refrigerator overnight. This allows the vinegar to tenderize the muscle fibers and the spices to penetrate deep into the meat. If you are short on time, a minimum of 2 hours is required.
Step 5: The Slow Simmer
Preheat your pot or Dutch oven. Add the marinated meat along with all the excess sauce from the bowl. Pour in the remaining beef stock and add the roasted tomatoes. Bring the mixture to a boil, then immediately reduce the heat to low.
Cover and simmer gently for roughly 3 to 3.5 hours. You are looking for “fork-tender” status—the meat should fall apart with zero resistance. If using a slow cooker, set it to low for 8 hours.
Serving Suggestions: Tacos vs. Stew
Once your Birria is cooked, you have two delicious paths forward. Both begin with removing the meat from the pot and shredding it with two forks.
Option A: Birria en Caldo (Stew)
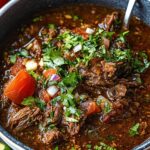
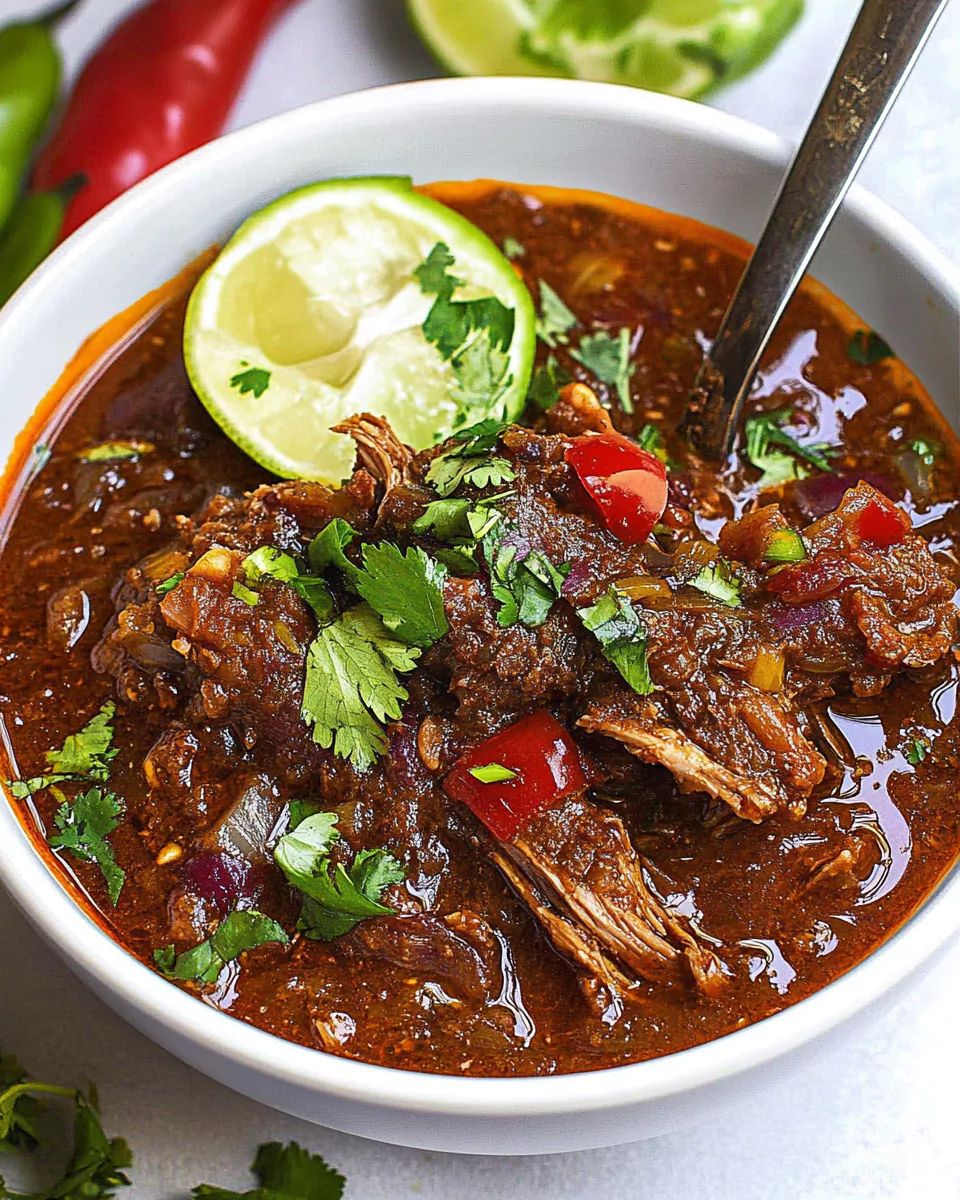
Ladle the hot broth (consomé) into bowls. Add a generous portion of the shredded meat. Top immediately with diced white onion, chopped cilantro, and a squeeze of fresh lime juice. Serve with warm corn tortillas on the side for rolling.
Option B: Quesabirria Tacos (The Crowd Favorite)
This is the trendy method that has taken the world by storm. To make these:
- Skim the vibrant red fat that has risen to the top of your pot. This is “liquid gold.”
- Dip a corn tortilla into this red fat.
- Place the tortilla on a hot griddle or skillet.
- Add cheese (Oaxaca or Mozzarella) and a pile of shredded meat.
- Fold the taco over and fry until the tortilla is crispy and red, and the cheese is melted.
- Serve with a small cup of the consomé for dipping.

Storage and Reheating
Birria is one of those rare dishes that actually tastes better the next day, as the flavors continue to meld. Store the meat and broth together in an airtight container in the refrigerator for up to 5 days.
To freeze
Why You’ll Fall in Love with This Authentic Birria
There is a reason why Mexican Birria has exploded in popularity across social media and restaurant menus worldwide. It is the ultimate comfort food that manages to be both sophisticated in flavor and humble in its roots. This recipe is designed to bring that authentic, street-style experience into your home kitchen, ensuring you don’t just make dinner, but create a culinary memory.
- Unmatched Versatility: This single recipe serves two distinct purposes. You can enjoy it as a traditional, soul-warming stew (birria en caldo) served in deep bowls with fresh onion and cilantro, or you can transform it into the famous crispy red tacos (quesabirria) that are dipped in the rich broth.
- Naturally Healthy & Inclusive: In a world of complex dietary restrictions, this recipe shines. It is naturally gluten-free and dairy-free, relying on the richness of the chilies and meat rather than thickeners or creams to achieve its velvety texture.
- Texture Heaven: The slow-cooking process breaks down the collagen in the meat, resulting in protein that shreds effortlessly with a fork, while the broth becomes gelatinous and rich.
- Aromatic Experience: The combination of cinnamon, ginger, and cloves creates a scent that will fill your home with an inviting warmth, perfect for chilly evenings or Sunday family dinners.
A Deep Dive into the Ingredients
The secret to a world-class birria de res (beef birria) or traditional goat birria lies in the quality and selection of the dried chilies. These are not just for heat; they provide the base body, color, and fruitiness of the sauce. Understanding your chilies is the first step to mastery.
The “Holy Trinity” of Birria Chilies
This recipe utilizes a specific blend of dried peppers to achieve a balanced flavor profile that is neither too spicy nor too bland. Here is a breakdown of what each pepper contributes to the pot:
| Chili Variety | Flavor Profile | Heat Level | Role in Recipe |
|---|---|---|---|
| Guajillo | Bright, tangy, slight berry notes | Mild to Medium | Provides the vibrant red color and acidic brightness. |
| Ancho | Deep, sweet, raisin-like, smoky | Mild | Adds body, thickness, and dark earthy undertones. |
| Chile de Árbol | Sharp, clean heat, nutty | Hot | Optional strictly for controlling the spice level (the “kick”). |
Selecting the Meat
While this recipe calls for lamb shoulder for a traditional flavor, the beauty of the marinade is that it works exceptionally well with various cuts of beef. If you prefer beef, opt for cuts that are high in connective tissue and marbling.
- Beef Shank (Chamorro): The bone marrow adds incredible richness to the stock.
- Chuck Roast: Readily available and offers a great balance of meat and fat.
- Short Ribs: Expensive, but they provide the most tender, melt-in-your-mouth texture.
Preparation Phase: Tools & Mise en Place
Before you turn on the stove, ensure your kitchen is prepped. Birria is a process of layering flavors, and having the right equipment ensures a smooth workflow.
Essential Equipment Checklist:
- Dutch Oven or Heavy Pot: Essential for heat retention during the long simmer.
- High-Speed Blender: Crucial for pulverizing the tough skins of the dried chilies into a silky smooth sauce.
- Fine Mesh Sieve: If your blender isn’t high-powered, you will need this to strain the sauce for a refined texture.
- Cast Iron Skillet: For toasting the chilies and aromatics.
Step-by-Step Cooking Instructions
Follow this guide to build the layers of flavor that make this dish iconic. Do not rush the toasting or marinating steps, as they are foundational to the end result.

Step 1: Toasting and Rehydrating the Chilies
The first step is to wake up the oils in the dried peppers. Remove the stems and seeds from the Guajillo and Ancho peppers. Heat a dry pan over medium heat and toast them for 1-2 minutes per side. Watch them closely: dried chilies can turn from toasted to burnt in seconds, and burnt chilies will make your entire sauce bitter. Once toasted, submerge them in hot water for 20 minutes until they are pliable and soft.
Step 2: Building the Aromatic Base
While the chilies soak, use the same pan to sauté your white onion and fresh tomatoes in olive oil. You want a bit of char on them to mimic the flavor of roasted vegetables. Add the garlic in the last minute of cooking to prevent it from burning. This step adds a sweetness that balances the acidity of the chilies.
Step 3: Creating the Adobo (The Sauce)
This is where the magic happens. In your blender, combine:
- The rehydrated chilies (add a splash of the soaking liquid if you like earthy flavors, or use fresh water for a cleaner taste).
- The sautéed onion, tomato, and garlic mixture.
- Spices: Mexican oregano, cumin, cinnamon, ginger, black pepper, and sea salt.
- Liquids: Apple cider vinegar (for tenderizing) and 1 cup of beef stock.
Blend on high until completely smooth. If the mixture looks grainy, pass it through a sieve. You want a thick, velvety red paste.
Pro Tip: Taste your adobo sauce before adding it to the raw meat. It should be slightly saltier and more acidic than you think is necessary, as it will dilute significantly once the meat juices and remaining stock are added.
Step 4: The Marination
Massage the red chili sauce into your chunks of meat. Ensure every crevice is covered. For the absolute best results, let this sit in the refrigerator overnight. This allows the vinegar to tenderize the muscle fibers and the spices to penetrate deep into the meat. If you are short on time, a minimum of 2 hours is required.
Step 5: The Slow Simmer
Preheat your pot or Dutch oven. Add the marinated meat along with all the excess sauce from the bowl. Pour in the remaining beef stock and add the roasted tomatoes. Bring the mixture to a boil, then immediately reduce the heat to low.
Cover and simmer gently for roughly 3 to 3.5 hours. You are looking for “fork-tender” status—the meat should fall apart with zero resistance. If using a slow cooker, set it to low for 8 hours.
Serving Suggestions: Tacos vs. Stew
Once your Birria is cooked, you have two delicious paths forward. Both begin with removing the meat from the pot and shredding it with two forks.
Option A: Birria en Caldo (Stew)
Ladle the hot broth (consomé) into bowls. Add a generous portion of the shredded meat. Top immediately with diced white onion, chopped cilantro, and a squeeze of fresh lime juice. Serve with warm corn tortillas on the side for rolling.
Option B: Quesabirria Tacos (The Crowd Favorite)
This is the trendy method that has taken the world by storm. To make these:
- Skim the vibrant red fat that has risen to the top of your pot. This is “liquid gold.”
- Dip a corn tortilla into this red fat.
- Place the tortilla on a hot griddle or skillet.
- Add cheese (Oaxaca or Mozzarella) and a pile of shredded meat.
- Fold the taco over and fry until the tortilla is crispy and red, and the cheese is melted.
- Serve with a small cup of the consomé for dipping.

Storage and Reheating
Birria is one of those rare dishes that actually tastes better the next day, as the flavors continue to meld. Store the meat and broth together in an airtight container in the refrigerator for up to 5 days.
To freeze