When your day has been nonstop and the last thing you want is to spend hours in the kitchen, having a go-to recipe that’s both effortless and delicious is a total game-changer. This Easy Baked Caesar Chicken fits that bill perfectly—it’s packed with bold flavors, incredibly tender, and requires almost zero cleanup. It’s the kind of meal that tastes like a gourmet production but comes together in just a few simple steps.
The secret lies in the combination of creamy Caesar dressing and sharp Parmesan cheese, which creates a savory “crust” that locks in every drop of moisture. Whether you’re a novice cook or a seasoned pro looking for a reliable weeknight fix, this dish is guaranteed to become a staple in your rotation. If you’ve ever struggled with dry, flavorless chicken breasts, this foolproof method is about to change your dinner game forever.
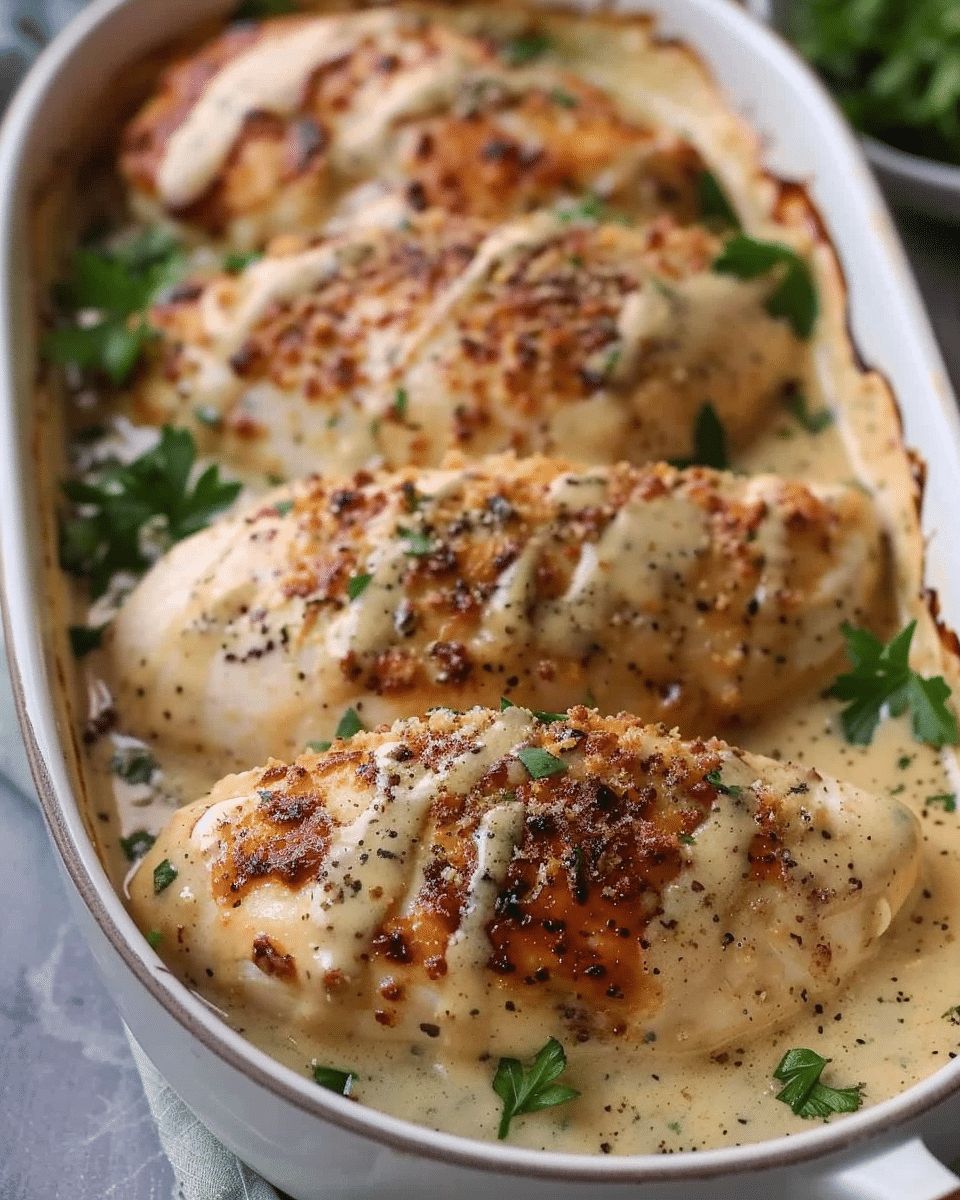
Quick Answer: Baked Caesar Chicken is a simple 5-ingredient dish where chicken breasts are coated in Caesar dressing and Parmesan cheese, then baked until golden. The dressing acts as a marinade and a moisture seal, resulting in a juicy, flavorful protein perfect for pairing with salads or roasted vegetables in under 40 minutes.
Why You’ll Love This Easy Baked Caesar Chicken Recipe
You want a meal that tastes like you put in hours of effort without the associated stress or fuss. This dish delivers exactly that. Here’s why it’s worth adding to your weekly rotation:
- Minimal prep time: You only need about 10 minutes to get everything ready for the oven.
- Pantry-friendly ingredients: Parmesan, Caesar dressing, and chicken—simple staples that create magic when combined.
- Guaranteed juiciness: Baking with a cheesy, creamy topping locks in moisture, preventing the chicken from drying out.
- Crowd-pleaser: From picky kids to hungry adults, the savory, familiar flavors satisfy everyone at the table.
- Versatile: It’s incredibly easy to tweak with your favorite dressing brands or extra spices.
The Essential Ingredients for Success
Creating a restaurant-quality meal at home doesn’t require a culinary degree; it requires high-quality pantry staples that work together harmoniously. For this Easy Baked Caesar Chicken, the magic lies in the interaction between the acidity of the dressing and the saltiness of the cheese. Each ingredient serves a specific purpose in building the final flavor profile.
What You’ll Need
Before you begin, gather these five core ingredients. While the recipe is simple, selecting the right versions of these items can elevate the dish from “good” to “extraordinary.”
| Ingredient | Quantity | Pro-Tip for Selection |
|---|---|---|
| Boneless Chicken Breasts | 4 large pieces | Look for air-chilled chicken for less water shrinkage. |
| Parmesan Cheese | 1½ cups (divided) | Freshly grate a wedge for better melting properties. |
| Caesar Salad Dressing | 1 cup | Use a high-quality, refrigerated brand for better tang. |
| Black Pepper | ½ teaspoon | Coarsely ground provides better texture and heat. |
| Sour Cream | ½ cup (optional) | Full-fat version creates the most luxurious sauce. |

Ingredient Substitutions and Variations
If you find yourself missing an ingredient, don’t worry. This recipe is incredibly forgiving. If you don’t have sour cream, Greek yogurt is an excellent substitute that adds a similar tang with a bit more protein. For those who want a bit of heat, adding a pinch of red pepper flakes or a teaspoon of Dijon mustard to the Caesar mixture can provide a lovely kick.
Expert Tip: If you are monitoring your sodium intake, look for “Low Sodium” Caesar dressings, as the Parmesan cheese already provides a significant amount of saltiness to the crust.
Step-by-Step Culinary Breakdown
The beauty of this recipe is that it can be prepped in under 10 minutes, making it ideal for those nights when the kids have practice or you’ve worked late. Following the correct sequence ensures that the chicken stays juicy while the topping becomes perfectly golden and crisp.
1. Prepare Your Chicken for Even Cooking
One of the most common mistakes in home cooking is using chicken breasts of varying thicknesses. To avoid the thin end drying out while the thick end is still raw, follow these steps:
- Place your chicken breasts between two sheets of plastic wrap or in a large Ziploc bag.
- Using a meat mallet or even a heavy rolling pin, gently pound the thicker parts until the entire breast is roughly 3/4 to 1 inch thick.
- Pat the chicken dry with paper towels before adding the cheese; this helps the Parmesan “crust” adhere better.
2. The Layering Technique
Instead of just tossing everything together, layering creates distinct textures. Start by pressing 1 cup of the Parmesan and the black pepper onto both sides of the chicken. This creates an initial umami barrier. Next, whisk your Caesar dressing and sour cream until smooth. This mixture should be thick enough to coat the back of a spoon.
Place the chicken in your prepared baking dish and pour the sauce over the top. Finish with that final 1/2 cup of Parmesan. This top layer is what will eventually caramelize under the broiler to give you that satisfying “crunch.”
The Science of the Perfect Bake
Baking chicken is often a source of anxiety for many cooks—no one wants to serve undercooked poultry, but overcooked chicken is like eating cardboard. By using a two-stage cooking method—baking followed by broiling—you get the best of both worlds: a cooked-through interior and a toasted exterior.
Monitoring Temperature
We recommend baking at 375°F (190°C). This temperature is high enough to cook the chicken efficiently without scorching the dairy-based sauce. Here is a quick reference guide for your meat thermometer:
| Stage | Temperature | Action Required |
|---|---|---|
| Initial Bake Done | 150°F (65°C) | Switch oven to “Broil” mode. |
| Broiling Finished | 160°F (71°C) | Remove from oven immediately. |
| Final Safe Temp | 165°F (74°C) | Reached during the “Resting” phase. |
The Importance of Resting
Once you remove the chicken from the oven, do not cut into it immediately! Covering the dish loosely with foil and letting it sit for 5 to 10 minutes is critical. During this time, the carryover heat finishes the cooking process, and the muscle fibers relax, allowing the juices to redistribute throughout the meat. If you cut it too early, those juices will run out onto the plate, leaving you with dry meat.
The Art of the Side Dish: What to Serve
While the Caesar Chicken is the star of the show, the right side dishes can turn a simple protein into a well-rounded meal. Because the chicken is rich and creamy, we recommend sides that provide freshness, acidity, or crunch.
- Garlic Roasted Broccoli: The char on the broccoli complements the toasted Parmesan perfectly.
- Lemon Herb Rice Pilaf: The citrus notes in the rice cut through the richness of the Caesar dressing.
- Zucchini Noodles (Zoodles): A fantastic low-carb option that stays light and refreshing.
- Classic Caesar Salad: For the ultimate Caesar lover, double down on the flavor profile with crisp Romaine and extra croutons.
Side Dish Comparison
| Side Dish | Prep Time | Dietary Profile |
|---|---|---|
| Roasted Green Beans | 15 mins | Keto, Gluten-Free |
| Mashed Potatoes | 25 mins | Vegetarian, Comforting |
| Quinoa Salad | 20 mins | High-Fiber, Healthy |
Nutrition Information for Easy Baked Caesar Chicken
For those tracking their macros or following a specific diet like Keto or Low-Carb, this recipe is a goldmine. It is naturally high in protein and very low in net carbohydrates, as the “breading” is made of cheese rather than flour or breadcrumbs.
Below is the estimated nutritional breakdown per serving:
| Nutrient | Value per Serving |
|---|---|
| Calories | 350 kcal |
| Protein | 42 g |
| Total Fat | 18 g |
| Carbohydrates | 3 g |
| Sodium | 680 mg |
Common Mistakes to Avoid
Even with a recipe this simple, a few small errors can impact the quality of your dinner. Keep these tips in mind to ensure a perfect result every single time you cook this dish.
Avoiding the “Soggy” Topping
If your topping isn’t getting crispy, it’s likely due to excess moisture. Make sure to pat the chicken dry before seasoning. Additionally, ensure your baking dish isn’t too crowded; if the chicken pieces are touching too closely, they will steam rather than roast, leading to a softer crust.
Don’t Over-Broil
The broiler is a powerful tool but it can be dangerous. Once you switch to broil, do not leave the kitchen! The transition from “golden brown” to “burnt” can happen in as little as 30 seconds. Stay by the oven and watch through the glass.
Tip: If you’re using a glass baking dish (like Pyrex), be careful with the broiler. Some older glass dishes can shatter under intense, direct broiler heat. Check your manufacturer’s instructions first!
Storing and Reheating for Meal Prep
This chicken is an excellent candidate for meal prep. Because of the sauce, it actually stays moister during reheating than traditional grilled chicken breasts.
- Storage: Place the cooled chicken in an airtight container for up to 3 to 4 days.
- Reheating: For best results, use the oven at 350°F until warmed through. This helps re-crisp the cheese. If using a microwave, cover the chicken and use 50% power to prevent the meat from becoming rubbery.
- Freezing: We do not recommend freezing this once cooked, as the cream-based sauce can separate and become grainy upon thawing.
You May Also Like
Explore more delicious dinner ideas: Quick Chicken Dinner Recipes, Keto-Friendly Meals, Savory Parmesan Dishes, and 30-Minute Weeknight Dinners.
Source: For more information on the culinary history of these flavors, visit Wikipedia.

Frequently Asked Questions
Can I make this recipe without sour cream?
Absolutely! While sour cream adds a wonderful richness and helps the sauce cling to the meat, you can easily substitute it with plain Greek yogurt for a high-protein alternative. If you prefer to keep it even simpler, you can use Caesar dressing on its own, though the topping may be slightly thinner.
How do I ensure the chicken stays juicy and not rubbery?
The secret is two-fold: even thickness and proper resting. By pounding the chicken to a uniform thickness, you ensure it cooks evenly. Most importantly, always let your chicken rest for 5–10 minutes under a loose tent of foil after baking. This allows the juices to redistribute instead of running out when you slice into it.
Is this Baked Caesar Chicken suitable for meal prep?
Yes, this is a fantastic meal prep option. Because the Caesar and Parmesan coating acts as a moisture seal, the chicken remains remarkably tender even after reheating. Store it in an airtight container for up to 3 days and reheat it gently in the oven to maintain the texture of the cheesy crust.
Final Thoughts
Finding a recipe that balances gourmet flavor with genuine ease is rare, but this Easy Baked Caesar Chicken delivers on every promise. It turns a handful of pantry staples into a tender, juicy, and sophisticated meal that fits perfectly into a busy lifestyle. Whether you are following a low-carb diet or just need a guaranteed crowd-pleaser for the family, this dish is a reliable winner.
Next time you are staring at a pack of chicken breasts with no plan, remember that a bottle of Caesar dressing and a sprinkle of Parmesan are all you need to transform your dinner. Bookmark this recipe for your next hectic weeknight and enjoy the effortless results!